

There are many website and landing page builders in the market; at a glance, there may seem like there's no difference between GetResponse and other platforms in terms of benefits and functionalities. However, GetResponse offers so much more as an all-in-one marketing platform that enables its users to manage all their marketing activities from a single platform.
Whether you're planning to create a website or landing page on GetResponse, you can now also optimize your content marketing strategy by adding a blog page on your GetResponse website and landing page. With BlogHandy, you can create a seamless blog page by adding a custom code to your GetResponse web and landing page.
In this post, we will dive deep into GetResponse as a landing page and web builder, and add a short tutorial on how to embed the BlogHandy codes on your GetResponse account. So, how do you integrate your BlogHandy account to create a blog page on your GetResponse web and landing page? How do you add a blog to the GetResponse landing page and website with BlogHandy? Here we go!
What is GetResponse?
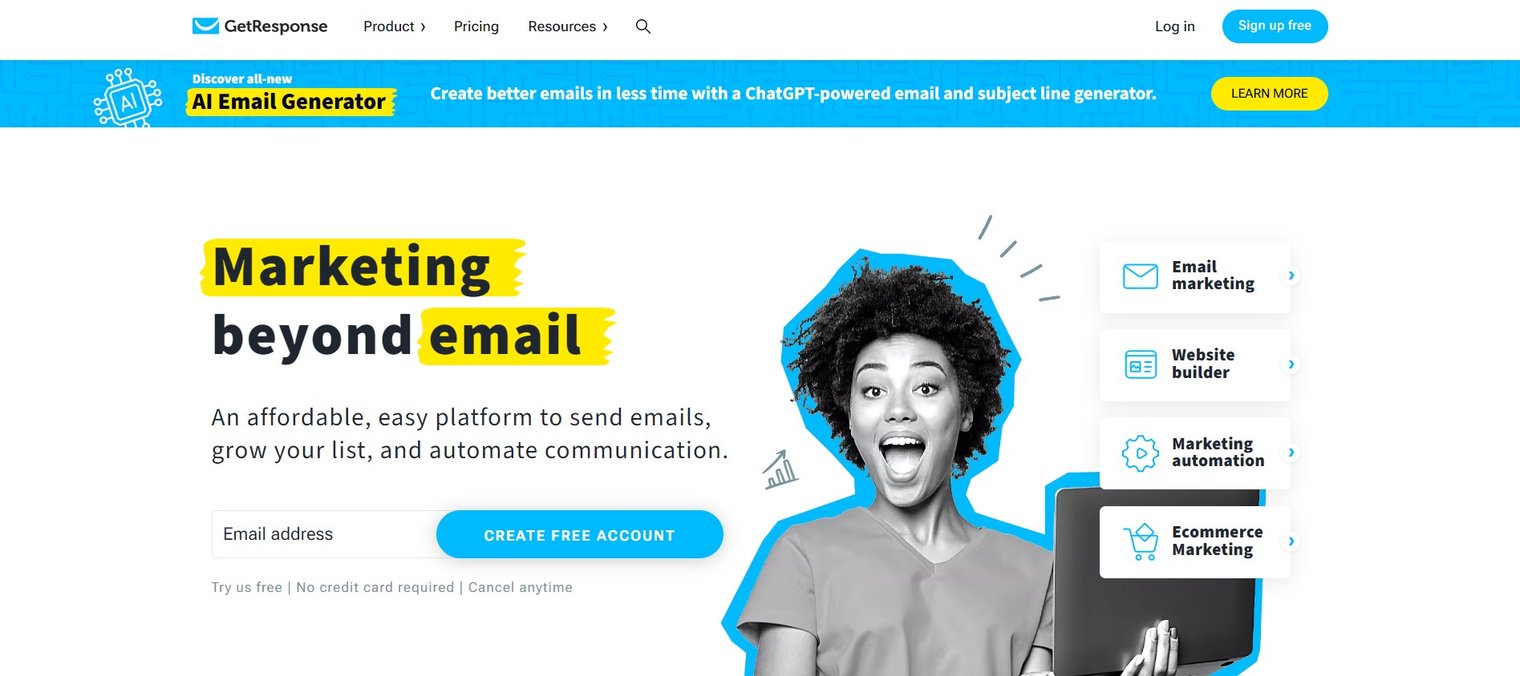
GetResponse claims as an all-in-one marketing platform, as they offer additional marketing features such as email marketing, marketing automation, and webinars on top of the website and landing page builder. Its drag-and-drop feature enables users to create a website and landing page with no coding knowledge required.
Compared to the other no-code web builder tools like Webflow, GetResponse comes with a more user-friendly interface with over 200 customizable templates that make it easier to create professional-looking pages for your website. It is also suitable for marketers, as it offers easy integrations with various built-in features, including email marketing services, CRM, and e-commerce platforms.
While you can start a free account on GetResponse for 30 days, their monthly plan is quite affordable, which starts from $15.58 per month, which you can choose based on your needs and functionalities.
Why You Should Add a Blog to Your GetResponse Landing Page and Website
A blog is an effective marketing idea to increase your website traffic, especially if you provide fresh and valuable content that can attract new visitors through search engine optimization. It is a great channel to showcase your expertise in your industry, which can help build your brand reputation and authority within the field.
By regularly publishing high-quality blog posts, you can improve your website's search engine rankings and visibility, which can lead to more traffic and potential customers for your business. You can also use other channels to boost the engagement rate for your blog posts, including Pinterest and other social media platforms.
According to Demand Metric, over 80% of B2B and B2C use content marketing to generate leads not only because it costs less than traditional marketing, but also because 82% of customers feel more positive about a brand after reading their engaging content online. Content marketing is an effective way to build an engaged audience, as well as strengthen your brand awareness in your industry.
You can now optimize your GetResponse landing page and website by adding a blog page using BlogHandy. With the combination of the intuitive interface in both platforms, you can add a blog page on your GetResponse landing page and website just by embedding two lines of BlogHandy code.
How to Add a Blog to GetResponse Landing Page with BlogHandy
As a landing page builder, GetResponse provides a range of features that help marketers create effective landing pages to increase conversions. On top of a drag-and-drop builder that makes it easy to create a landing page without coding, GetResponse also comes with A/B testing features to test different variations of your landing pages to see which performs best for your business.
GetResponse also provides pop-up options that statistically perform better in terms of conversion rate. Based on the study initiated by Sumo, the top 10% of the highest-performing pop-ups have an average of 9.28% conversion rate. You can set triggers for pop-ups on your GetResponse landing page, which can help you increase conversions and engagement on your landing page.
In this section, we will share a tutorial on how to create a GetResponse landing page and add a blog using BlogHandy. Here we go!
#1 Create a Landing Page on GetResponse
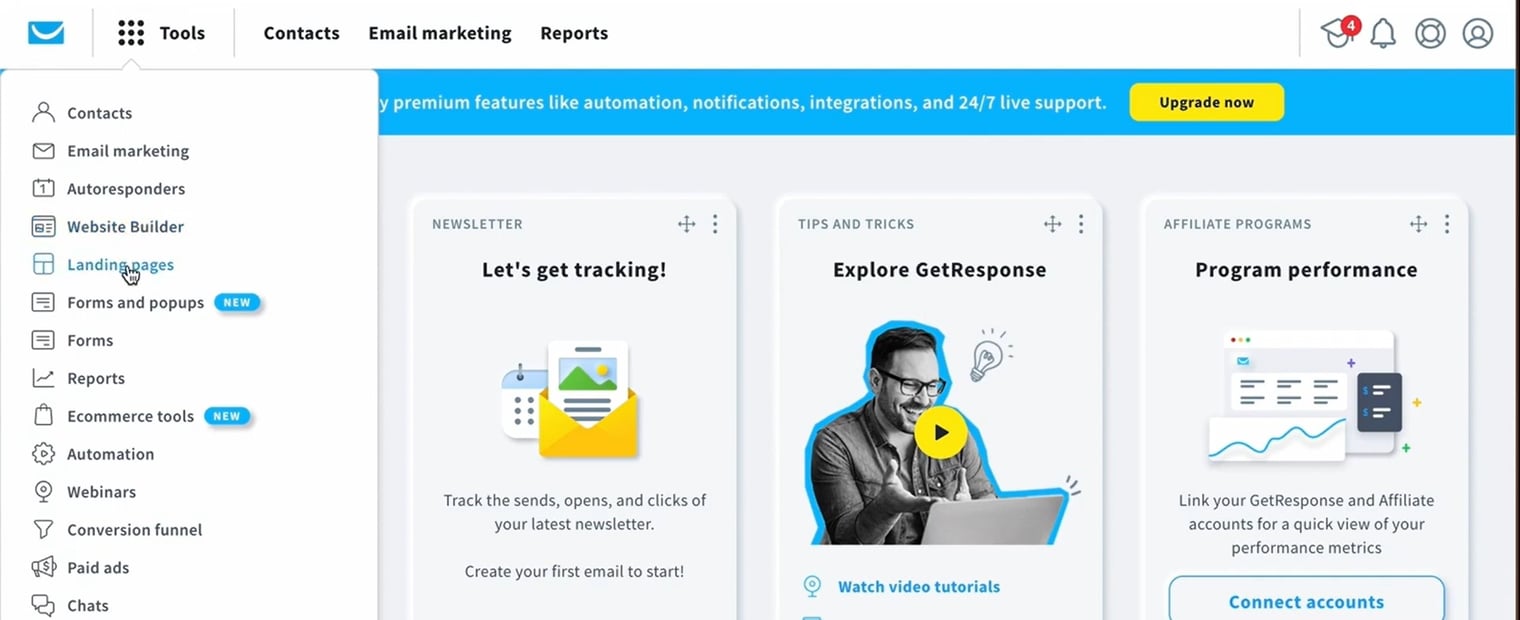
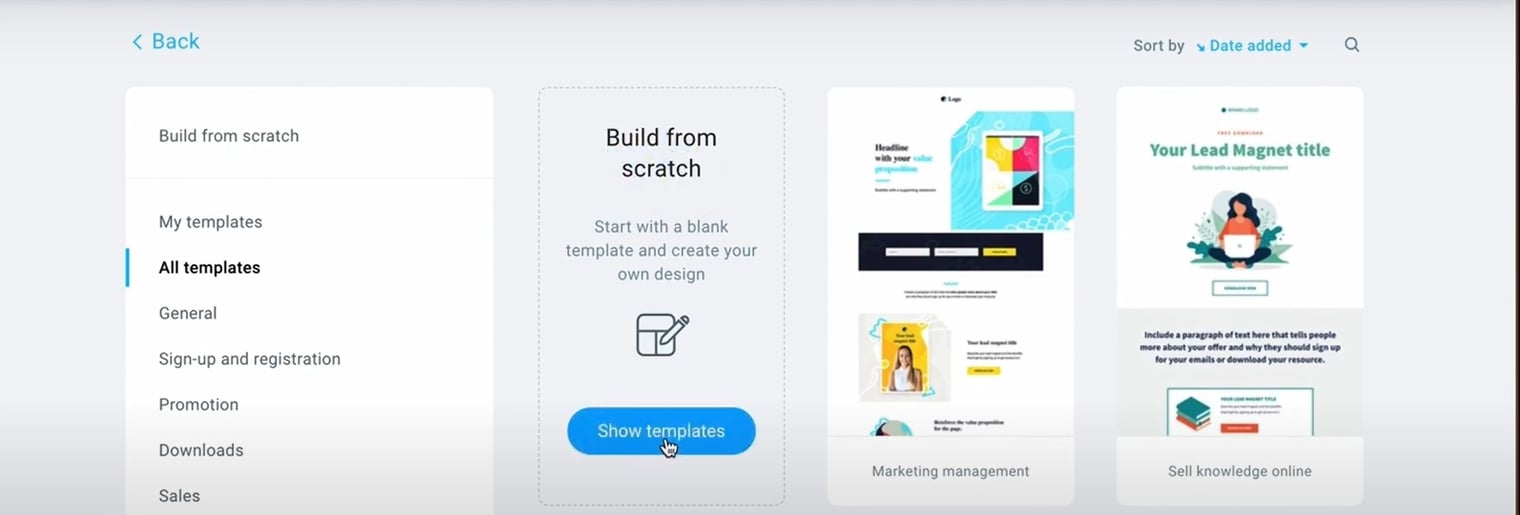
On your GetResponse dashboard, head over to the Tools option, and click Landing Pages to create a new one. You can click the "Create Landing Page" button, and it will lead you to the template options where you can choose one of the 200+ GetResponse customizable templates for a landing page on the platform.
Alternatively, you can also choose to build from scratch, where you can design your landing page by using its drag-and-drop editor.
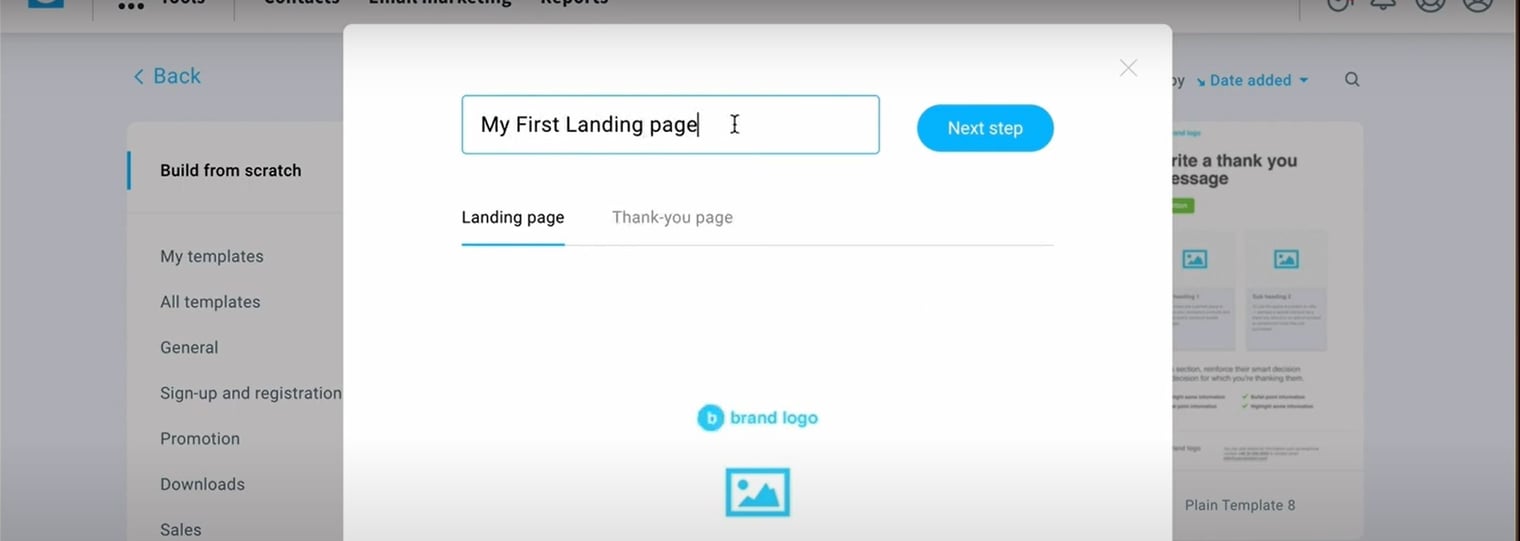
If you choose the latter, you will be given some layout options where you can easily choose the interface for your landing page. Once you pick your layout preference, you can add your landing page name.
#2 Add the BlogHandy custom code on GetResponse Landing Page
Once you add the name, it will lead you to the landing page editor on GetResponse, where you can find the tool options in the right corner. Scroll down to the bottom, as this is where you can find the </> icon to add a custom code on your GetResponse landing page.
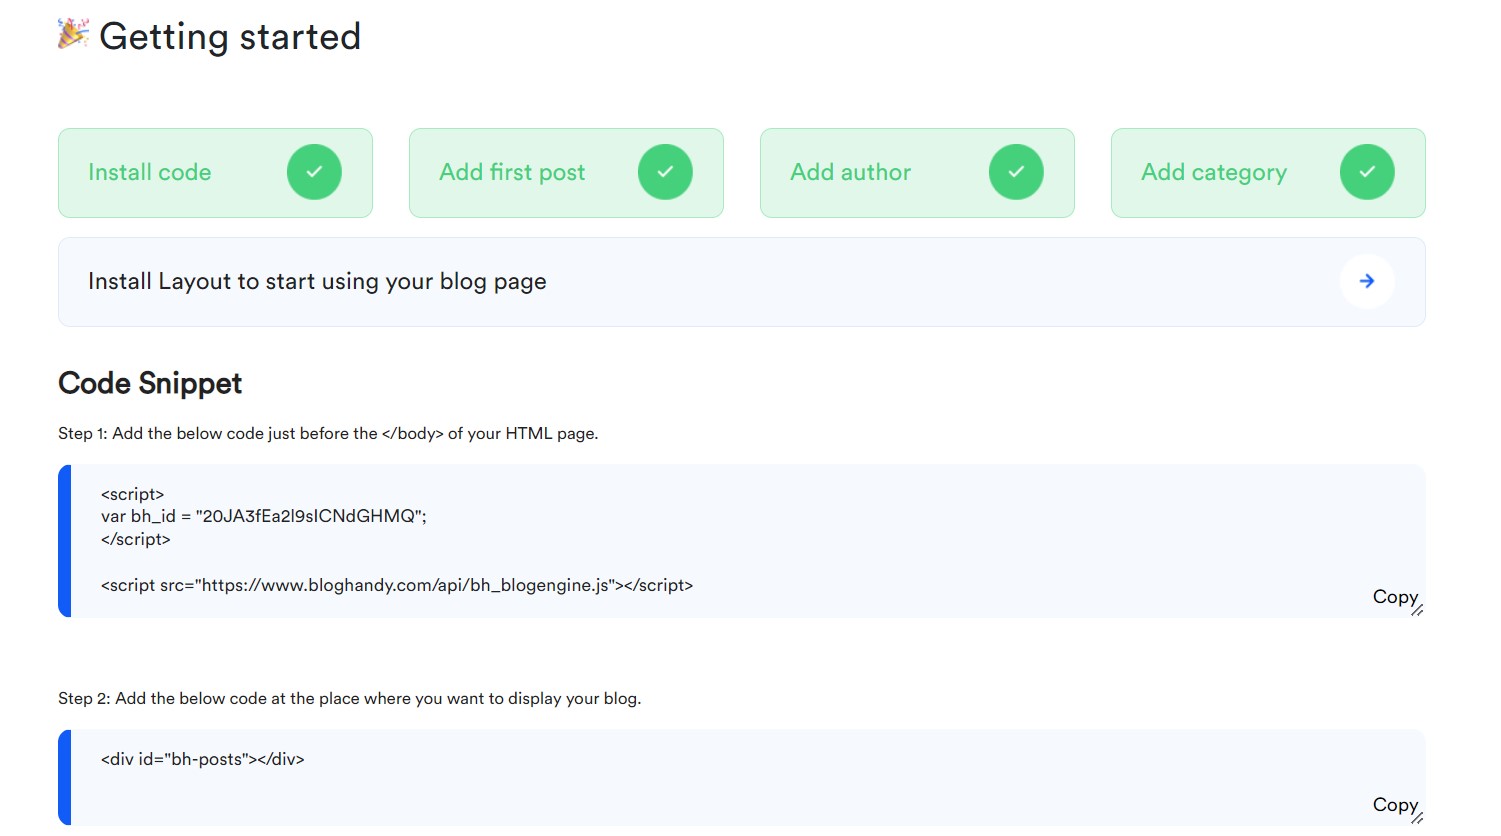
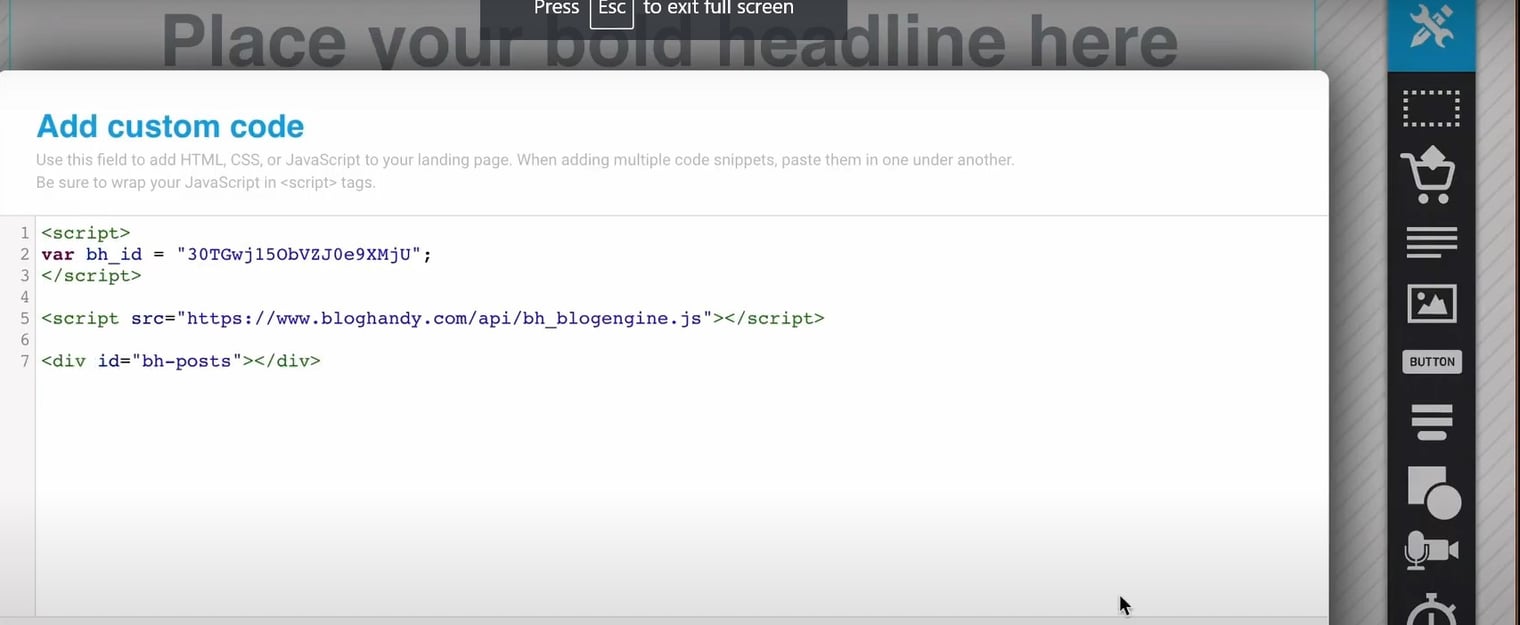
After you get the custom code box on your screen, go to your BlogHandy page and find the code snippet on your dashboard. Copy the two lines of code on the code snippet, and paste them into the custom code box on your GetResponse landing page. Click the "Save" button once you add the BlogHandy codes on GetResponse.
#3 Adjust the custom code layout on GetResponse Landing Page
Next, you need to adjust the custom code layout on your GetResponse landing page. You can use the cursor to make it look symmetrical with your entire landing page, and you can click the "Save" button on the top right of your monitor.
#4 Add the additional HTML code to finalize integrating BlogHandy on GetResponse Landing Page
You will see the HTML option next to the "Save" button you previously clicked, and the pop-up will come up to ensure that you want to use the HTML code on your GetResponse landing page. Click "Yes, continue" to keep it going, and the entire code of your GetResponse landing page will appear next.
Scroll to the bottom until you see the line where it says, "This is a custom code placeholder." This is the line where you put your BlogHandy code, and you can check a few lines above it to find the code as the following:
Once you find this code, add style=" height: auto," in-between "custom-code" and id=".
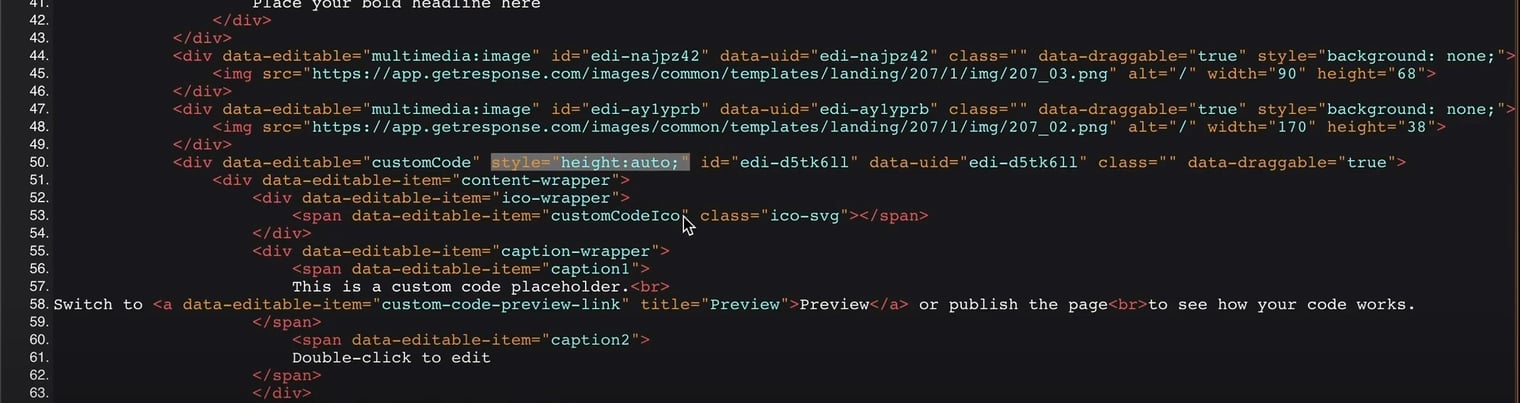
This is the code to ensure that your blog will appear on your landing page correctly with the right layout, so make sure to add this code to finalize the BlogHandy integration on your GetResponse landing page. Once it's added, you can continue to the "Next Step" button.
You can optimize the mobile version for your GetResponse landing page, but you can also click "Proceed without mobile versions" to publish your landing page afterward. The page will direct you to the live URL for your landing page, so you can review how it looks like from the user's point of view.

How to Add a Blog to GetResponse Website with BlogHandy
GetResponse may not be as popular as some other website builders tools like Wix or Weebly. However, GetResponse can be a good alternative for beginners who are looking to build a professional website that comes with a user-friendly interface and no coding skills necessary.
If you think your lack of web design skills will hinder you from having a professional-looking website for your personal brand or business, the good news is that GetResponse offers more than 200 customizable templates, and you can also create a website using their AI-powered website builder on their platform.
On top of that, you can also add the functionality of your website by adding a blog to your GetResponse website with BlogHandy to optimize your content marketing strategy to build authority within your field through your blog posts. We will share a short tutorial to add a blog to a GetResponse website using BlogHandy custom codes, so here we go!
#1 Create a GetResponse Website
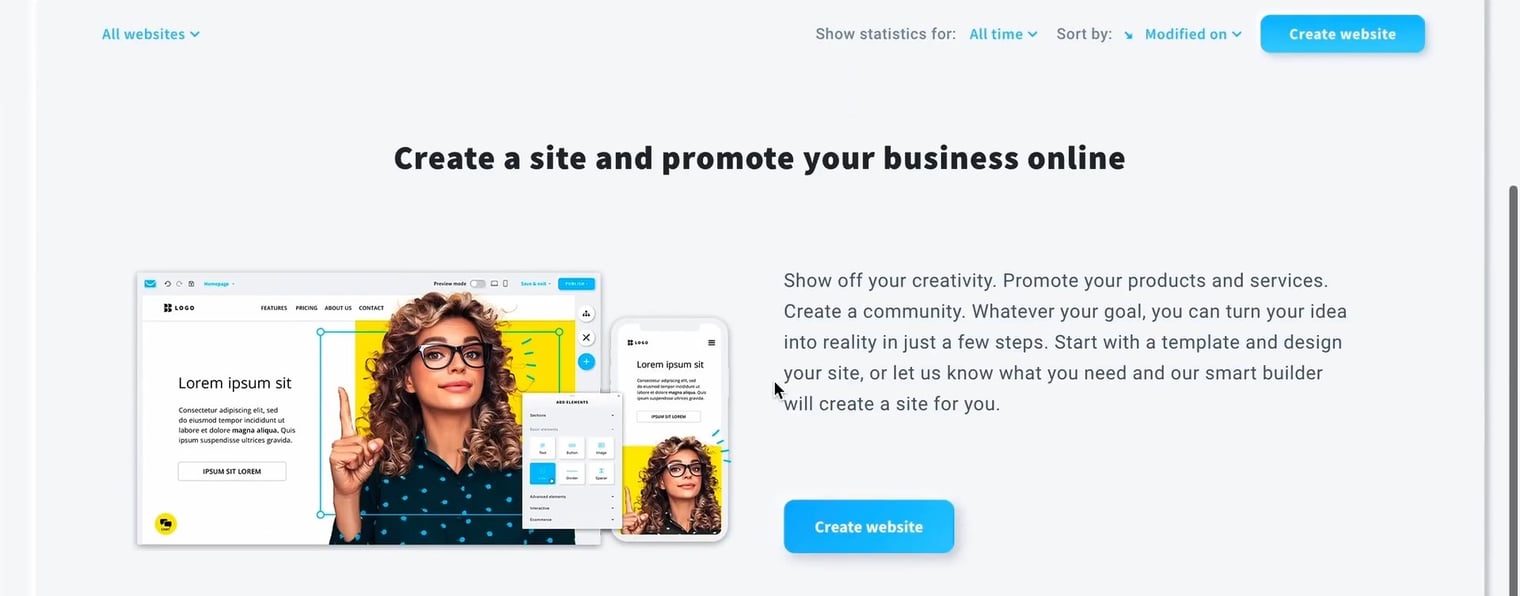
Once you sign up for an account on GetResponse, you can head over to their dashboard and find the "Tools" option on the left-hand side of your monitor. In this section, you will find various features they offer, from email marketing to creating forms and popups. Click "Website builder," which will take you to a similar page as seen above, and click "Create website" to continue.
It will take you to the option of whether you want to use the customizable templates or the AI-driven web builder on GetResponse. If you choose the first, you will be given a few predesigned templates, which you can edit using their drag-and-drop tools as you go.
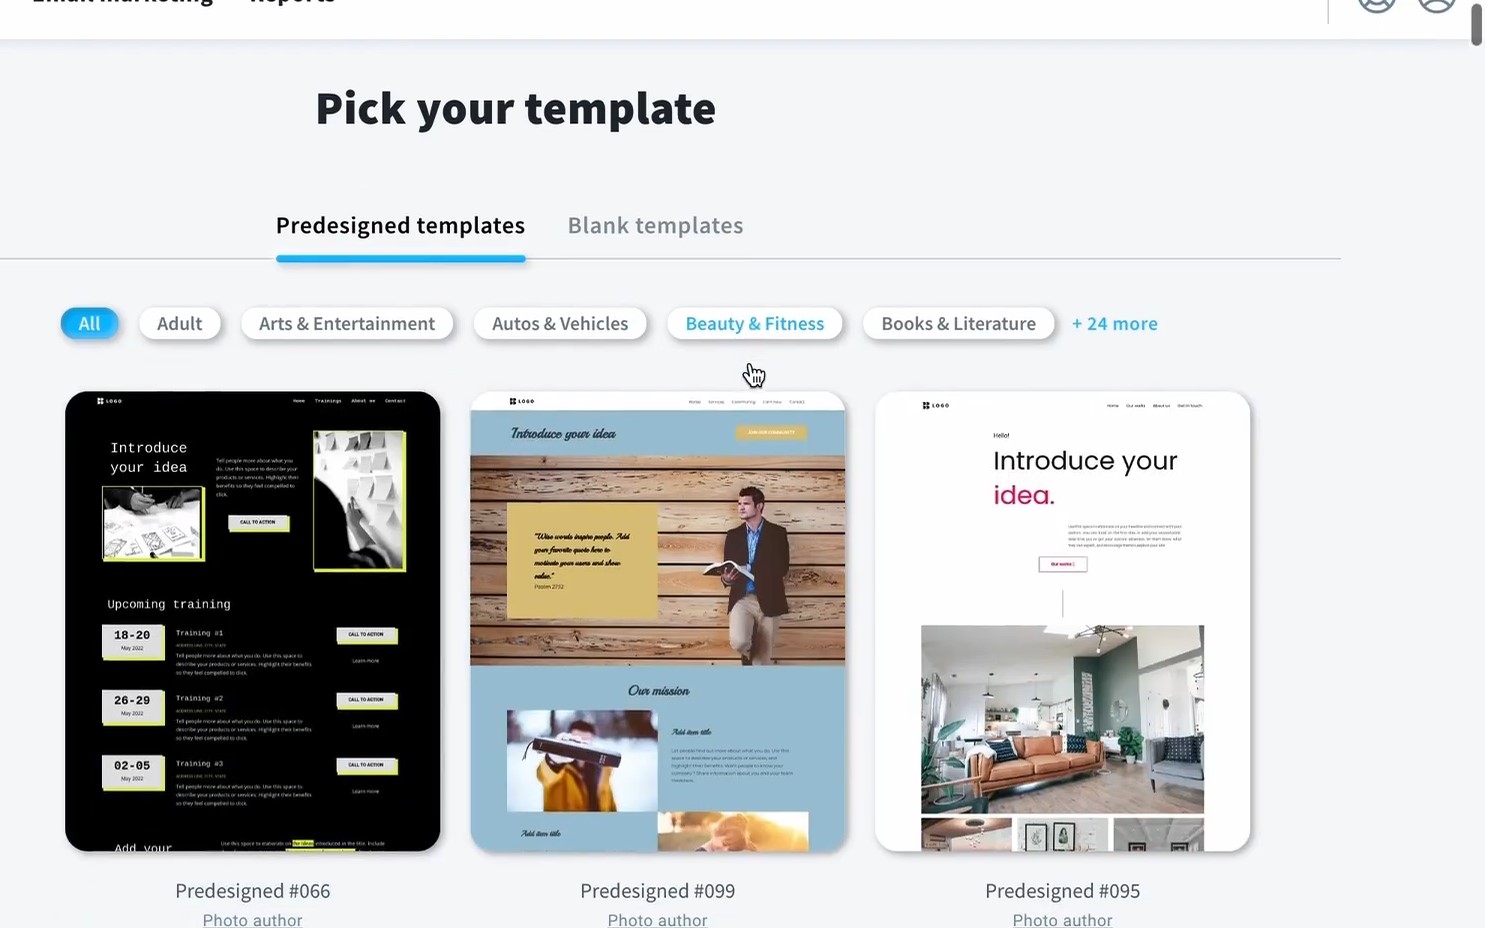
#2 Add a blog page to your GetResponse website
Once you choose your pre-designed template for your GetResponse website, it will direct you to the editor page where you can see the editor bar on the right side of your monitor. Head your cursor to the button where it says "Manage pages," and you will see the breakdown of the pages you have on your website as the following:
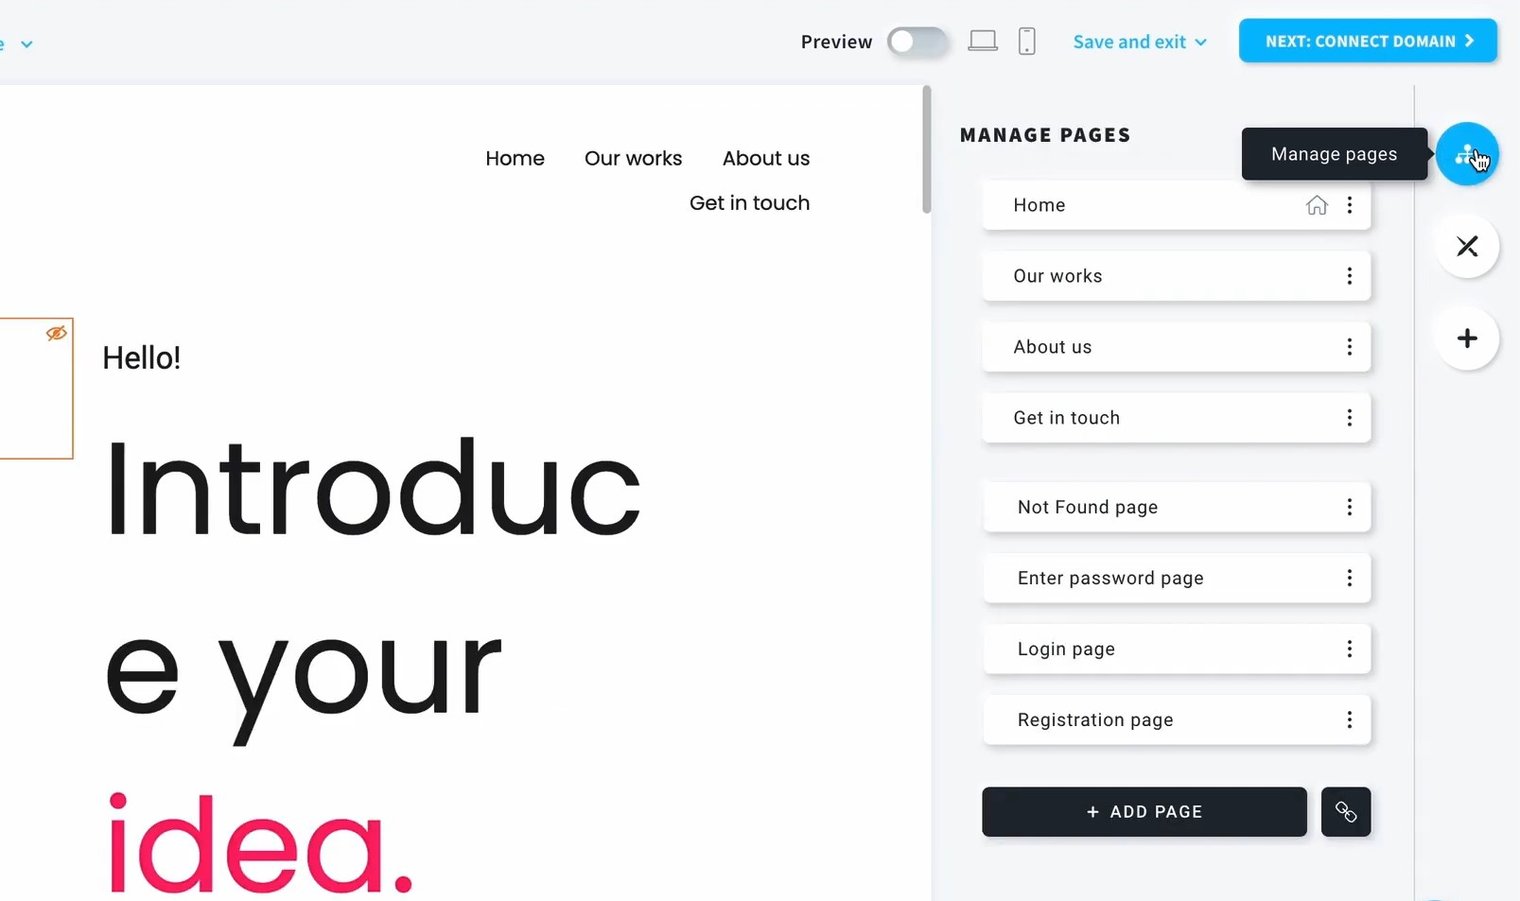
Scroll down, and click the "Add Page" button to create a new page on your GetResponse website. After you click it, you will be given the option to choose how you want the layout of your blog page looks. Alternatively, you can also pick "Blank Page" to start a new page from a clean slate instead of choosing the predesigned layout options on GetResponse.
Rename your new page to "Blog," and it should be reflected on the main menu of your website once you've done it.
#3 Add BlogHandy custom codes on your GetResponse website
Go to the blog page that you created, and you will see the "Section 1" option where you can add the BlogHandy custom codes to implement on your GetResponse website. Check your Bloghandy dashboard to get the two lines of code, and click the "Add elements" on the menu bar of your GetResponse editor page.

First, you can drag and drop the "Text" box to add a title for your blog page, and then you can click "Add elements" again to drag the "Custom code" box where you can copy and paste your BlogHandy custom codes on your GetResponse website.
When it's successfully added, you will see a block that says "Insert custom code." Click the block, and a new box will appear on the right-hand side of your monitor, where you can copy your BlogHandy codes.
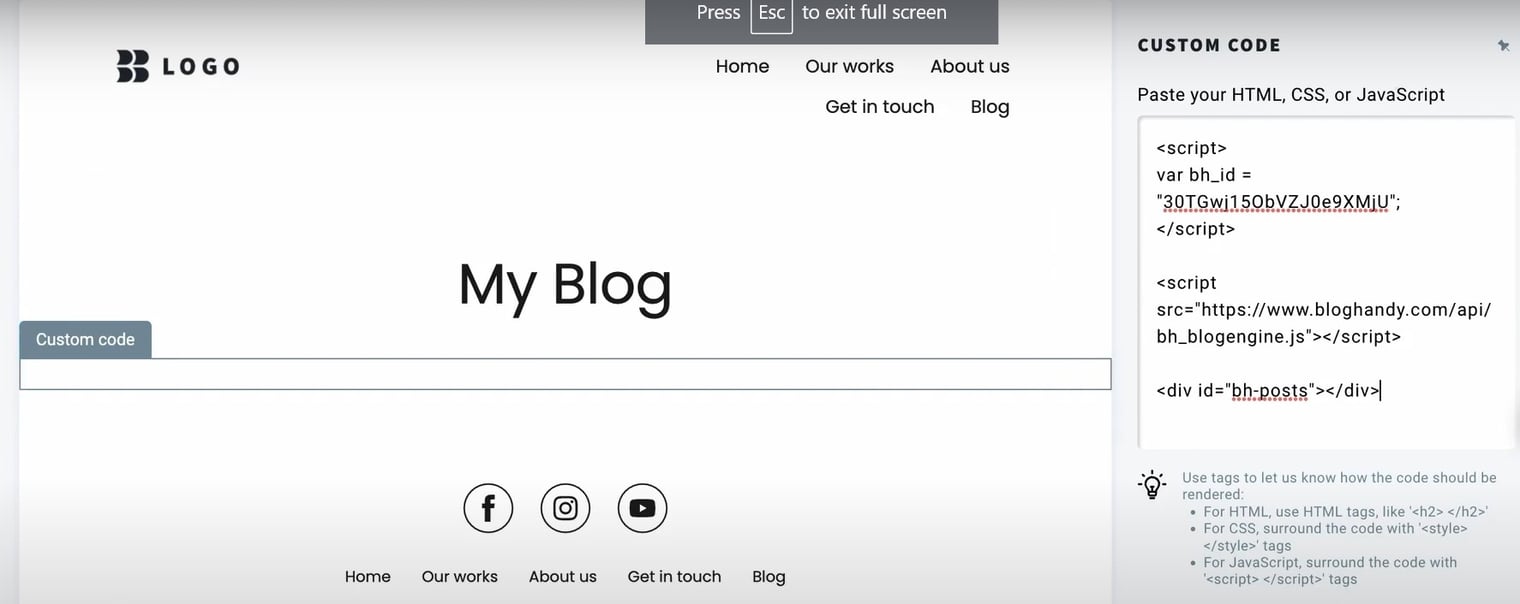 Copy the two lines of code on your BlogHandy dashboard, and paste them on your GetResponse editor page to integrate both platforms accordingly.
#4 Connect the domain to your GetResponse Website
On the top of your monitor, you will see the "Connect domain" button. Click it next, and add your website name along with your GetResponse website domain to publish it. It will take you directly to your new website URL, then click it to preview your website. By now, your BlogHandy page should be added to your GetResponse website.
#5 Save the blog URL on BlogHandy settings

Next, to integrate the update on your blog post moving forward, you can copy the blog URL and go back to your BlogHandy dashboard. Go to Settings, and you can paste the blog URL on the General settings to update.
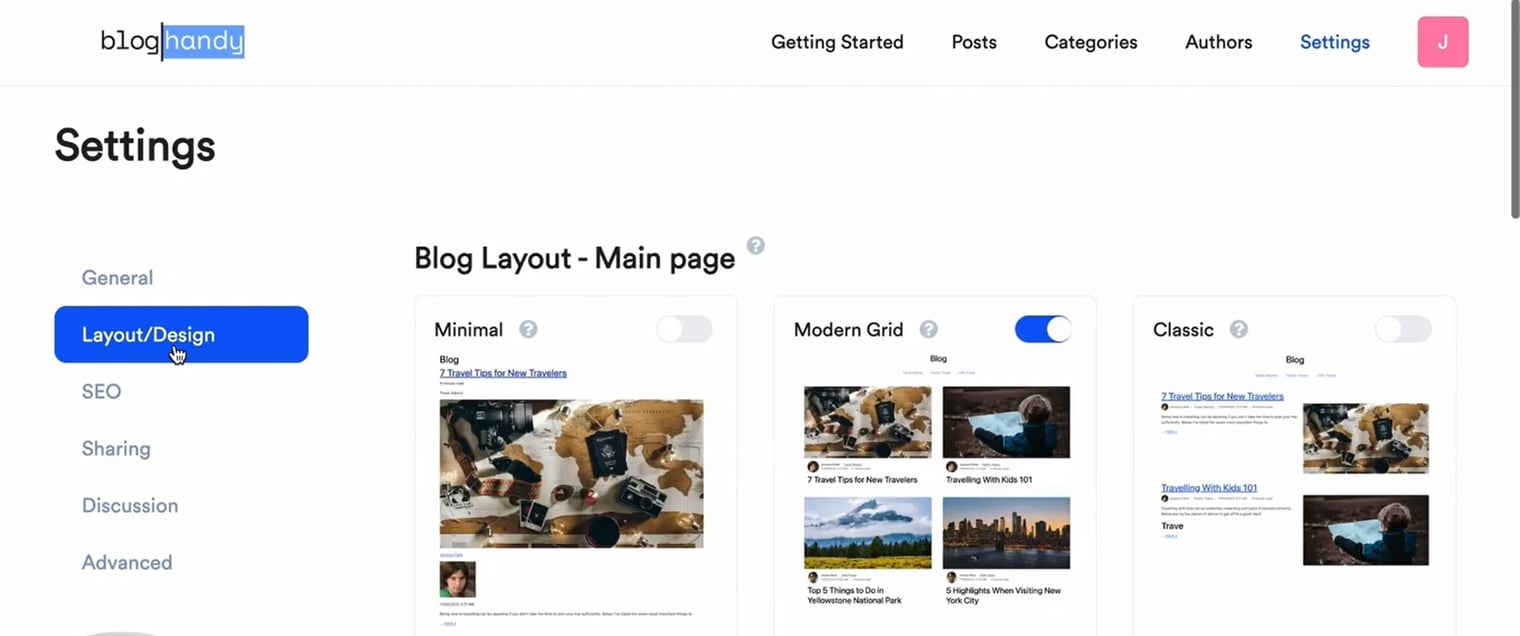
#6 Change the blog layout on BlogHandy
Once your BlogHandy account and GetResponse website are integrated, you can now edit the blog layout directly on your BlogHandy. To do so, you can go to Settings, and click Layout/Design to pick one of the pre-made templates on BlogHandy so you can have it on your GetResponse website without any further editing on your website builder.
Conclusion
Adding a blog to the GetResponse landing page and website is now easier with BlogHandy, as it allows you to integrate your blog seamlessly by embedding two lines of code on your landing page or website.
Both GetResponse and BlogHandy offer intuitive interfaces that make them suitable for beginner users, especially those who know nothing about coding. While the GetResponse landing page and website can help them to create a beautiful-looking online presence for their brand, BlogHandy can help optimize it with its SEO-optimized core for their blog posts.
So, do you have a GetResponse landing page or website that you want to optimize with a blog section? Sign up for a BlogHandy free account now to take advantage of this rich feature for your landing page and website on GetResponse!