
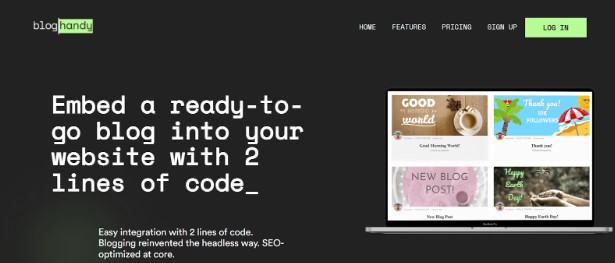
Carrd enables you to create a simple yet fully-responsive one-page site for various needs. Whether you want to create a landing page or need one for your portfolio, Carrd offers many template options that you can easily customize. BlogHandy provides an additional feature to complete your web experience on Carrd by integrating it with a seamless blog section.
In this post, we will go through a few simple steps to integrate BlogHandy on your Carrd website and showcase the Carrd and BlogHandy tutorial video by the end of the post.

What is Carrd?
A simplified web builder, Carrd is a platform for creating a one-page site that is fully responsive and user-friendly, even for those non-techies. You can create various sites on Carrd, from a digital resume to a company profile or a landing page.
While signing up is free, you can do much more with their Carrd Pro version. It will give you access to their exclusive features, including a custom domain, widgets, and Google Analytics integration. All these for only $19 per year!
The user-friendly interface on Carrd is easily adjusted, even for beginners. Carrd also offers high functionality that one can only need so much for their website. Its responsiveness enables you to create a fully-responsive website that is mobile-friendly too.
Getting Started with Carrd and BlogHandy
To enhance your Carrd website experiment, you can now incorporate a blog section by setting up a BlogHandy code on your landing page just through a few simple steps. In order to do it, you can create a BlogHandy account for free after creating your website on Carrd.
Adding BlogHandy to your Carrd Page
Log into your Carrd account, and click through a website where you want to add a blog using your BlogHandy code. It will take you to the demo page of your website where you can pick the section where you want to incorporate the blog and add the necessary code.
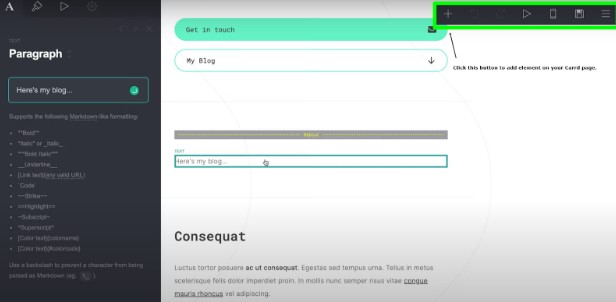
Adding an Embed Element on Your Carrd Page
Click the section where you want to add your blog; on the top right corner of your monitor, you will see the "+" button where you can add an element on your Carrd site.
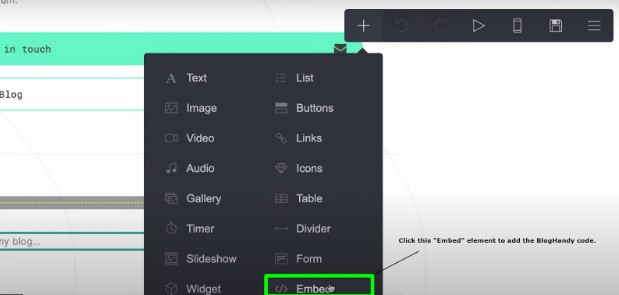
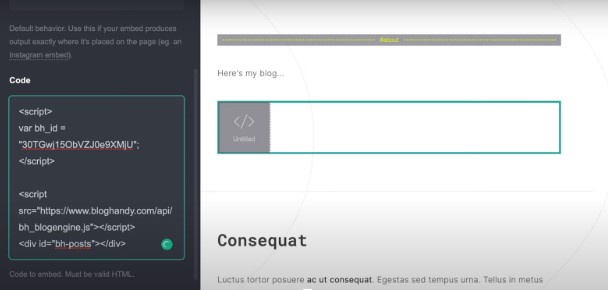
Adding a Custom HTML Element on Your Carrd Page
Once you select the "Embed" option, a sidebar menu will appear on your monitor. Scroll down and find the "Code" box to implement a custom HTML element on your Carrd page. This is the same section where you can add your BlogHandy code later.
Adding a BlogHandy Custom Code on Your Carrd Page
You need to log into your BlogHandy account to find the two lines of code on your dashboard. The codes on the box under Step 1 and Step 2 are the ones that you need to implement on your Carrd page. They will look similar to this:
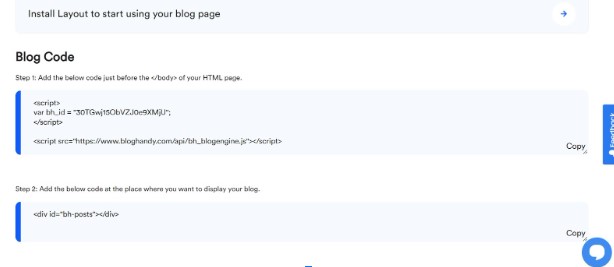
The code under "Step 1" on your BlogHandy dashboard refers to the HTML Element, and you can copy and paste it on the previous "Code" box on your Carrd page. Once it's added, proceed to the same with the one attached under "Step 2" and implement it under the first line of code.
Click Done, and you can publish the changes on your Carrd website.
Updating Your Blog URL in BlogHandy
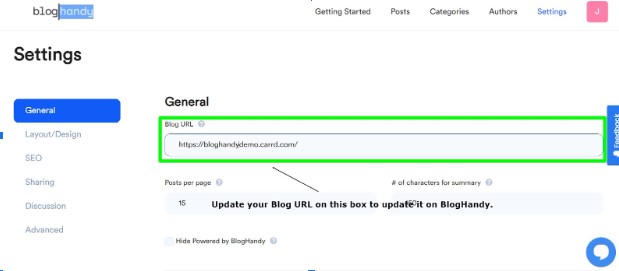
Once you publish the update, select the option to view the site where you can find your blog URL on your Carrd website. Then, copy the blog URL and update it on your BlogHandy account so you can modify the blog posts through the platform moving forward.
Head over to your BlogHandy dashboard, and click the "Settings" option on the main navigation.
On the "General" section, you will see the field where you can paste the blog URL and click "Save all changes" to update it on BlogHandy.
Publishing Your New Blog
Updating your blog URL is a simple step to integrating your BlogHandy and Carrd website. You can now create, save, and publish a new blog post through your BlogHandy account.
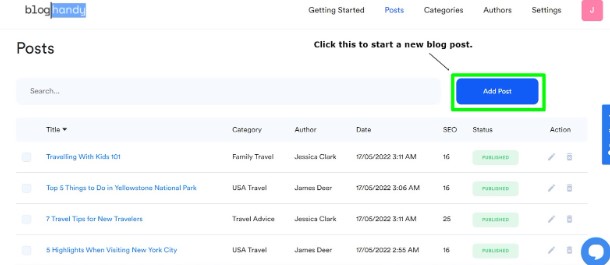
Go to "Posts" option on the main navigation, and click the "Add post" button to start creating a new blog post. It will direct you to a blog draft section where you can have the full authority of your blog status.
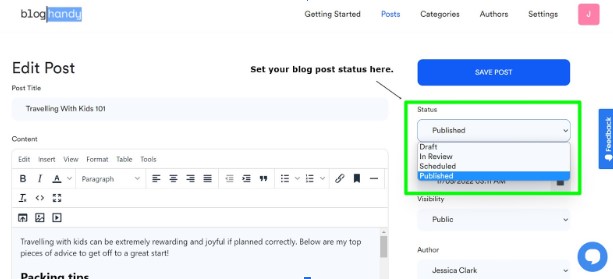
You can either keep it as a draft or set the status to "In Review," "Scheduled," or "Published." The latter two will enable you to pick the date and time you want it to be live on your website. Click “Save” button to finalize it.
Tips for Blogging with Carrd and BlogHandy
As a one-page web builder, Carrd is most suitable for beginners who want to start their online visibility through a website with little to no technical advantage in web development.
With various fully customizable templates on Carrd website, you can pick one that resonates more with your branding style.
By incorporating a blog using BlogHandy platform, your blog section will inherit the template you choose accordingly. And with the ability to add elements to your Carrd website, you can also use standard CSS to modify the design of your website and blog.
Start your blogging journey by signing up for the free trial on BlogHandy to get the most out of your online visibility on Carrd, or check the video below for the tutorial to incorporate BlogHandy on your Carrd website now!