.jpg)

There are many landing page builders on the market, but only a few can offer a mobile-optimized page for your business. Swipe Pages come with a solution for its user to build a high-converting landing page with top-notch accelerated mobile pages (AMP).
On top of their mobile-optimized landing page, Swipe Pages also have multiple advantages, including free hosting and an SSL certificate for all available plans. In addition, you can now incorporate a blog on your landing page by integrating your BlogHandy account on your Swipe Pages landing page.
In this post, we will get through a few steps to add a blog to the landing page you've created using the Swipe Pages platform.
What are Swipe Pages?
The AMP (accelerated mobile pages) feature on Swipe Pages is what makes it stand out compared to other landing page builders. At least 54.4% of website traffic nowadays comes from mobile devices, which is the value Swipe Pages brings to its users.
Apart from enabling users to create a fast-loading landing page that minimizes the bounce rate, Swipe Pages also allow you to make your landing page accessible for those visitors that come to your page using their smartphones.
With the relatively affordable premium plan from as low as $29 per month, Swipe Pages come with a drag-and-drop feature that makes it easier to use, even for beginners who don't know how to code. For ROI-driven users, Swipe Pages also have built-in analytics to check your page's performance at a glance.
Getting Started with Swipe Pages and BlogHandy
Swipe Pages is a feature-rich landing page builder that offers users a simple and intuitive interface on its platform. Another advantage of using Swipe Pages is that it also connects to over a thousand platforms and applications through direct integrations or Zapier.
One of the platforms that you can integrate directly with Swipe Pages is BlogHandy. BlogHandy enables you to create a blog on your landing page on Swipe Pages just by adding two lines of code within the page.
Here are some steps to do it!
Adding BlogHandy to Swipe Pages
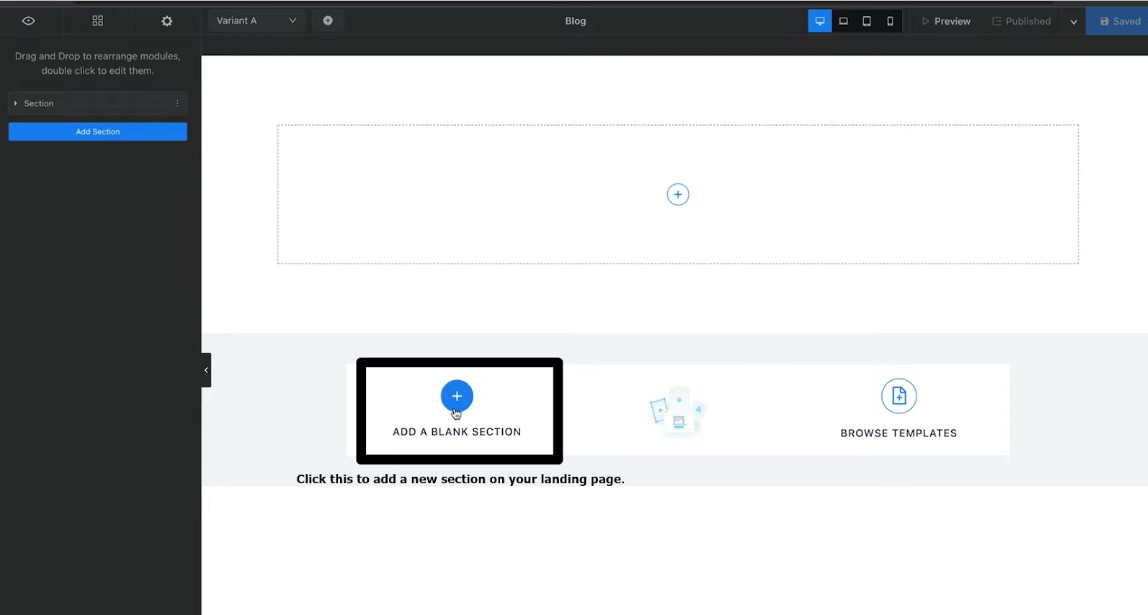
Now that your Swipe Pages site is up and running, it is time to incorporate a blog section within your landing page. Go to your Swipe Pages dashboard, and click the landing page where you want to add a blog page. It will direct you to the site editor page.
Add a new section on your landing page by clicking the "+" icon with the title "Add A Blank Section" on the editor page. You can choose the blog format, whether you want a full-width blog page or one with a sidebar.
Adding a Custom HTML Element on Swipe Pages
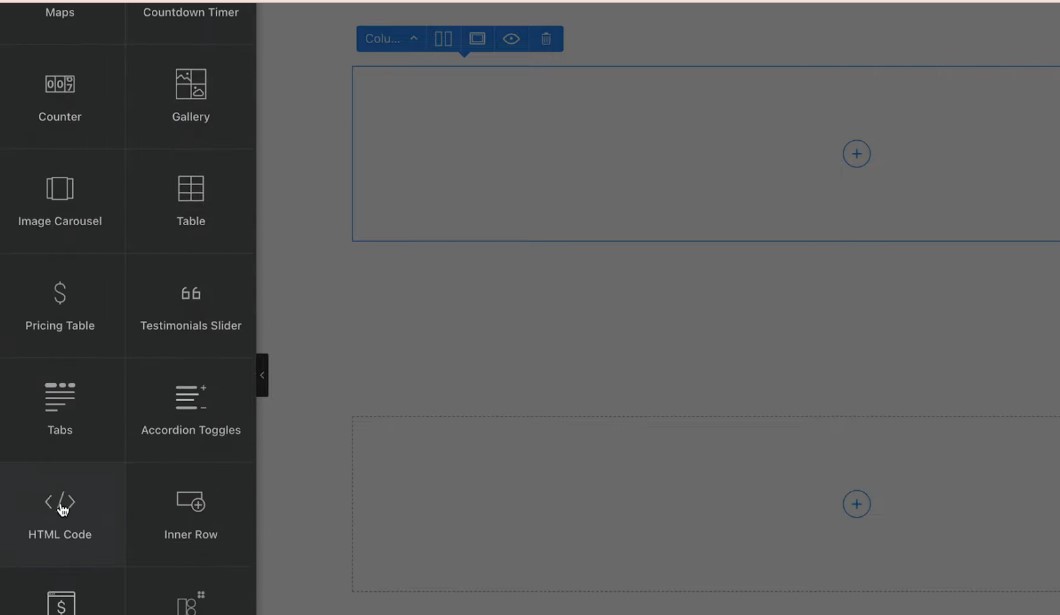
Once it's added, a new "+" will appear on the box where you added a blog section on your landing page. Click on it until you see some module options on the sidebar.
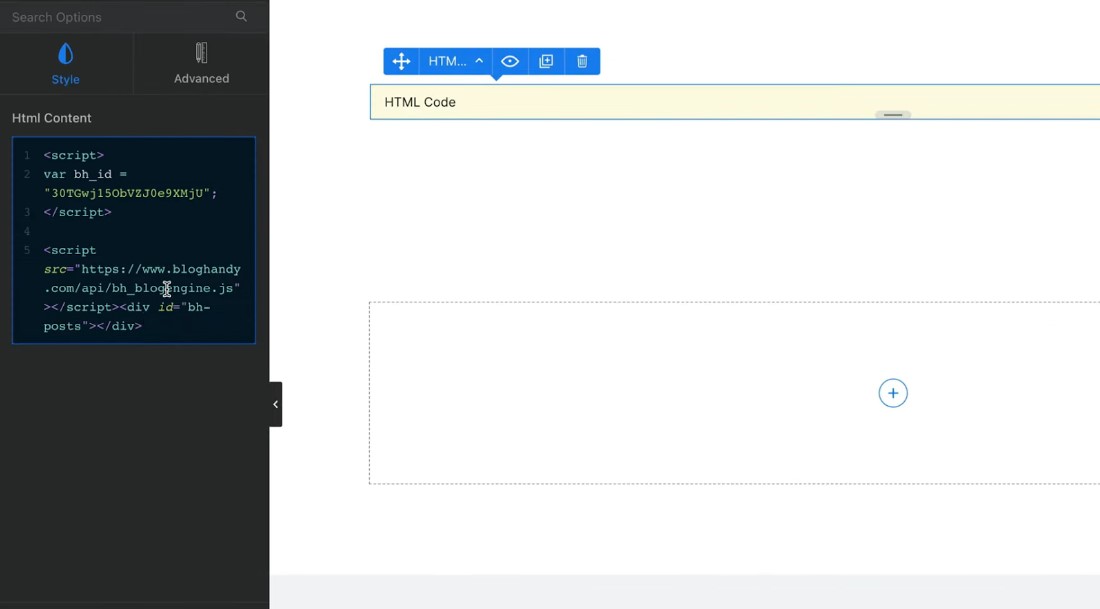
Scroll down and find the "HTML Code" module to incorporate it into your blog section. Next, you will see a box where you must paste the code from your BlogHandy account.
Adding a BlogHandy Custom Code on Swipe Pages
Go to your BlogHandy dashboard to copy the two lines of code to incorporate on your Swipe Pages site. Start with the first code on "Step 1" which looks like this:
After you copy the code, go back to your Swipe Pages editor, and paste it into the "Html Content" box. The latter is the same box where you will have to place your second BlogHandy code. Head back to your BlogHandy account to copy the code on "Step 2" which goes like this:
Paste it after the first code inside the "Html Content" box, and click "Save" and "Publish" to add your BlogHandy account to your Swipe Pages site.
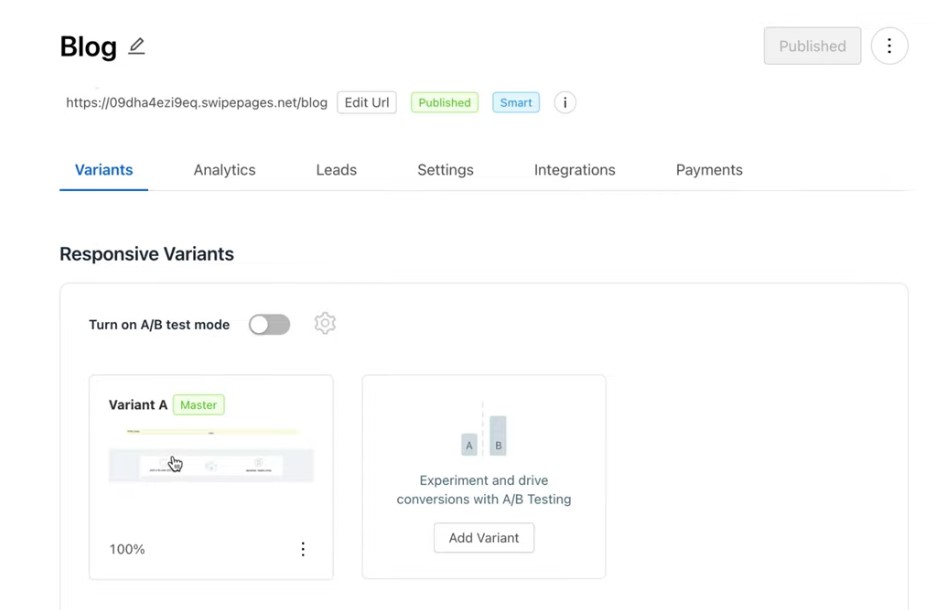
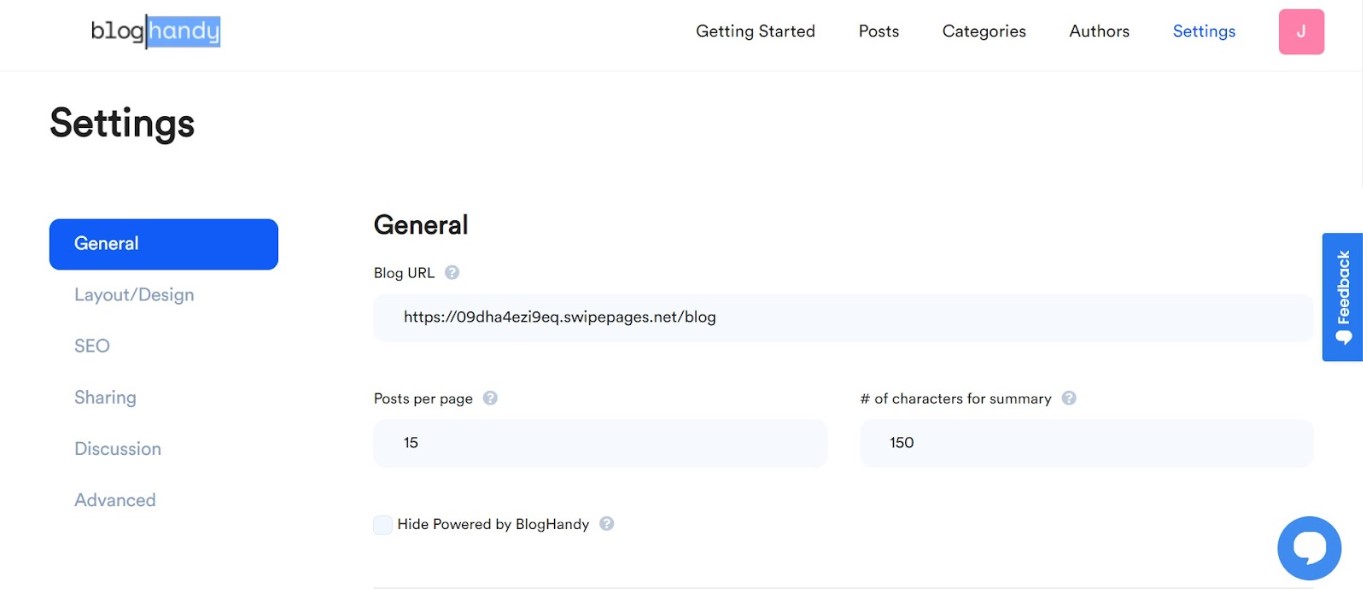
Updating Your Swipe Pages Blog URL in BlogHandy
Once your Swipe Pages site is published, find the arrow icon "v" where you will be given the option to either edit the URL or view the page. Click the latter, and now the page should showcase your blog section on your Swipe Pages.
Copy the URL, and go back to your BlogHandy account. Paste the URL on your BlogHandy settings, and save all changes to finalize the integration of your BlogHandy and Swipe Pages site.
Publishing a New Blog Post on Swipe Pages with BlogHandy
After updating your blog URL, you can now add and edit your blog posts through your BlogHandy account.
Head to the main menu navigation on your BlogHandy account, and click "Posts" to add a new blog post and modify the old posts you've published on your Swipe Pages blog. You will also see the "Add Post" button, which you can click to start a new blog post.
On BlogHandy's blog editor page, you can fully control the format of your blog post, as well as the SEO analysis for each post. Add the keyword and meta description, and you can also improve your post's SEO ranking by following the suggestions you can find in the Ranking/Statistics section.
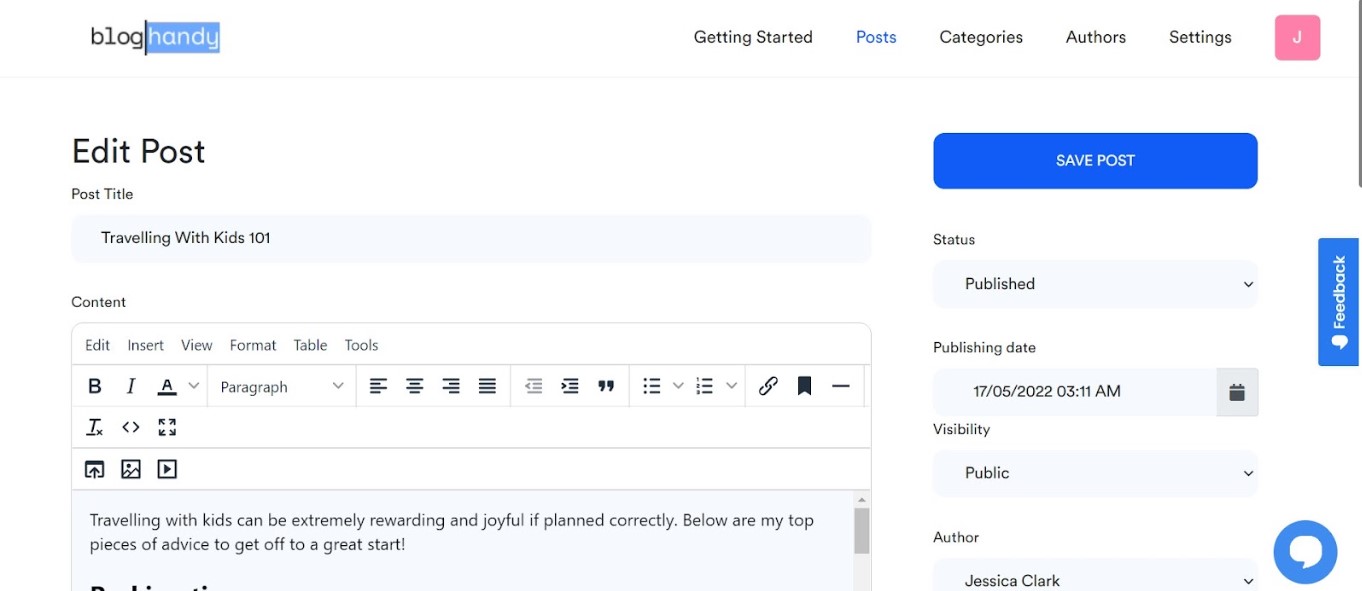
Change the status on the sidebar to "Published", and add the publishing date and time, and click "Save Post". Afterward, you can refresh your Swipe Pages blog section to see the new post you published through BlogHandy.
Tips for Blogging with Swipe Pages and BlogHandy
Since Swipe Pages already come with sophisticated features that let the landing page load fast with mobile-optimized AMP, BlogHandy will also automatically inherit the functionality for your blog section once it's fully integrated into your Swipe Pages site.
Combining the functionality of Swipe Pages and BlogHandy can be a good alternative if you're looking to improve your online existence through a fast-loading landing page and a completely featured blogging platform.
If you need to add a blog section to your Swipe Pages landing page, sign up for a free trial on BlogHandy now, and don't forget to check this video tutorial to see how to integrate BlogHandy on your Swipe Pages site!