

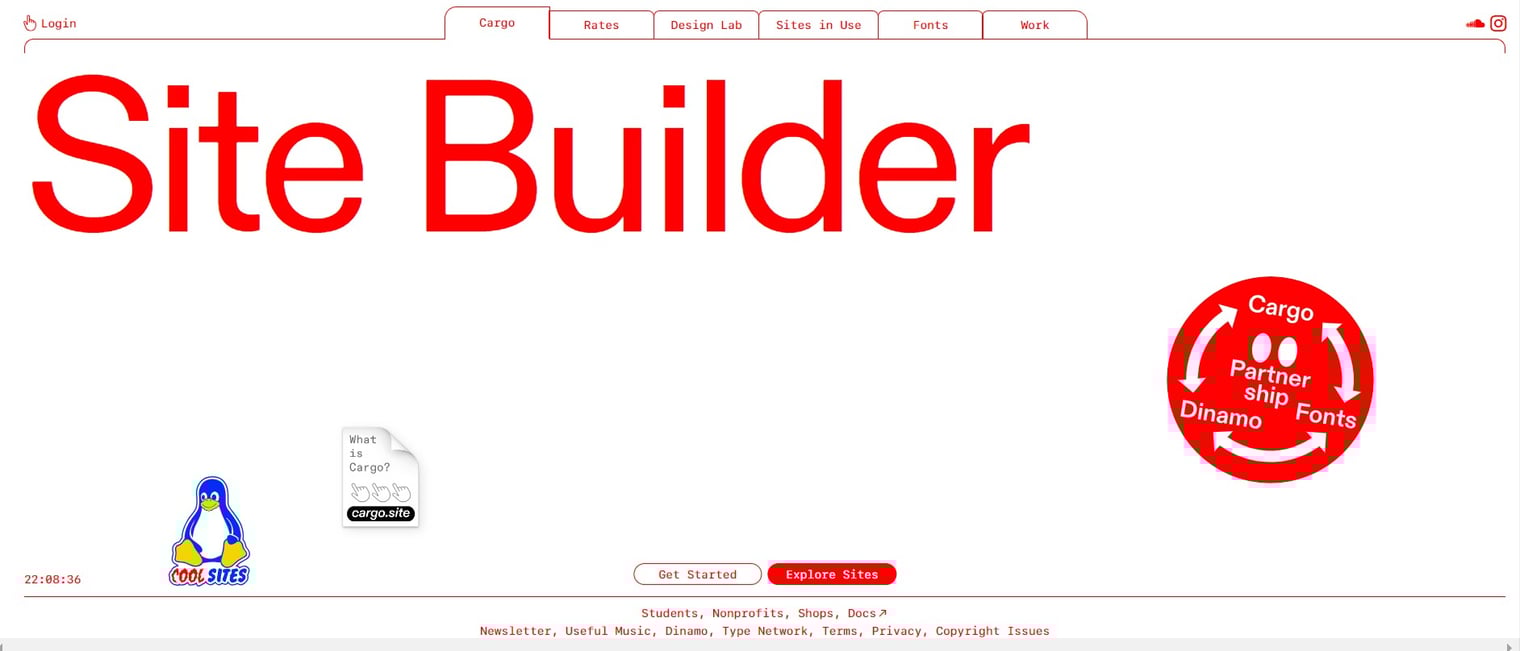
Cargo Site may not be the first platform that comes to mind when looking for a web builder. However, Cargo Site can be a great alternative if you're looking for an aesthetically pleasing website or landing page, especially if you're an artist looking to create a website for your portfolio.
In this post, we will dive into Cargo Site as an alternative if you're looking for a landing page builder to showcase your products or portfolio.
In addition, we will also add a tutorial on how to add a BlogHandy blog to your Cargo Site and how it can complement Cargo's functionality to fill the gap with its native features.
What is Cargo Site?
Whether you're planning to create a landing page or a multi-page website, Cargo Site offers some ready-to-use templates to duplicate, which can be pretty easy for beginners to use.
When you visit the Cargo Site website, chances are your first impression will be the fact that their web design is artistic and that it may be one of the best web builder platforms for artists or creative professionals. From minimalistic themes to colorful web templates, you can choose any template suitable to your style!
Cargo Site currently only offers a single rate for a website, which you can choose to pay either monthly or annually. In addition, their plan also includes a free custom domain connection to enhance your branding awareness through your website URL.
However, there are a few setbacks that you may want to consider before choosing Cargo Site for your landing page builder. One of them is pretty crucial, as Cargo Sites mostly only work with Chrome-like browsers like Google Chrome or Safari.
For some context, I tried to open one of the websites in their "Sites in Use" section on Firefox, and the website isn't accessible. It can be a downside of using the platform for your business website, as you can't control which browser your potential audience might use.
Unlike other web builders like Webflow or Wix, Cargo doesn't categorize the blog page from other web pages. It can be a little tricky, especially if you plan to boost your website for search engines through content marketing.
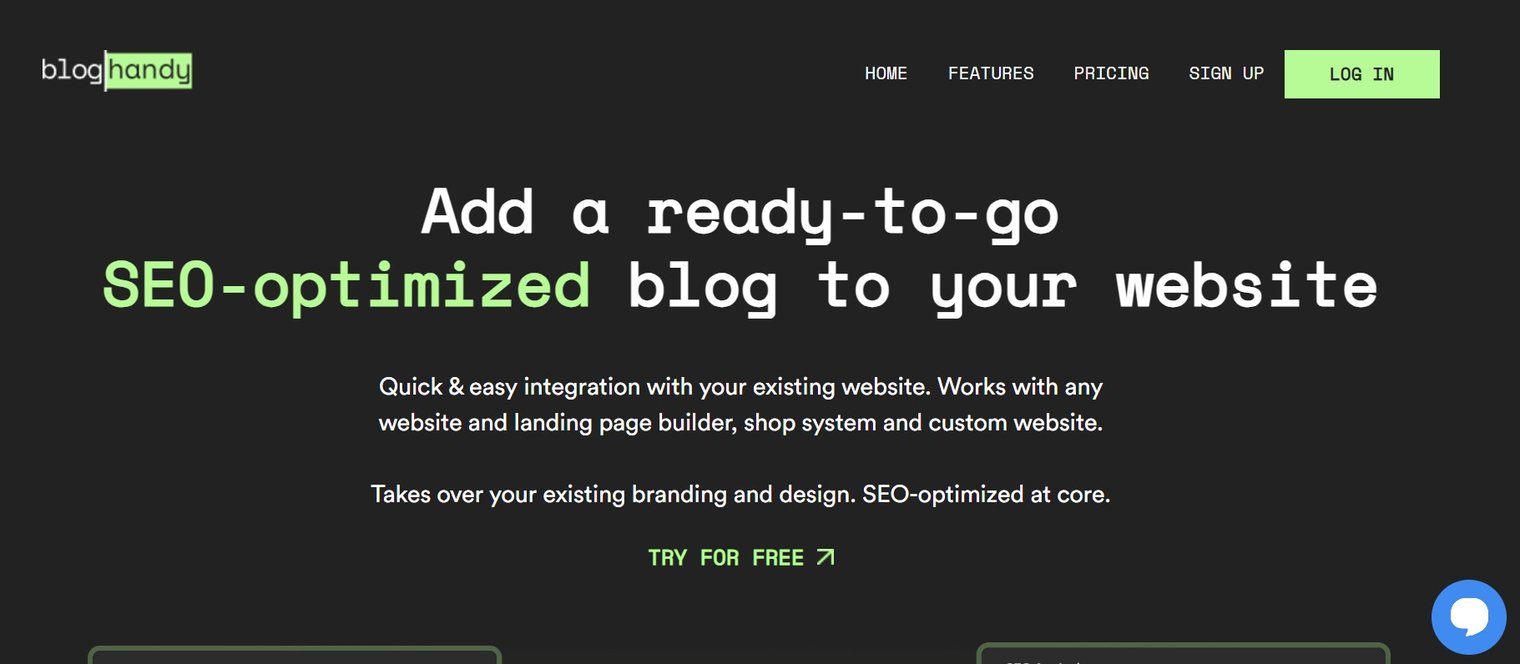
The good news is that you can now integrate Cargo Site with BlogHandy to improve your website functionality by streamlining the blogging platform on your site.
Only by adding two lines of code, you can add a blog to your Cargo Site with BlogHandy. The platform also allows you to add social sharing tools that can be beneficial if you want to use social media channels as one of your marketing strategies.
Tutorial: Adding a Blog to Your Cargo Site with BlogHandy
In this section, we will share step-by-step instructions on how to add a BlogHandy blog to your Cargo Site.
Although Cargo Site isn't exactly built to optimize your website for search engines, by adding a blog functionality with BlogHandy, you can start creating SEO content to get your website ranked in search engines like Google or Bing.
So, what do you need to do to add a blog to your Cargo Site?
#1 Add a section for your blog to your site page on Cargo
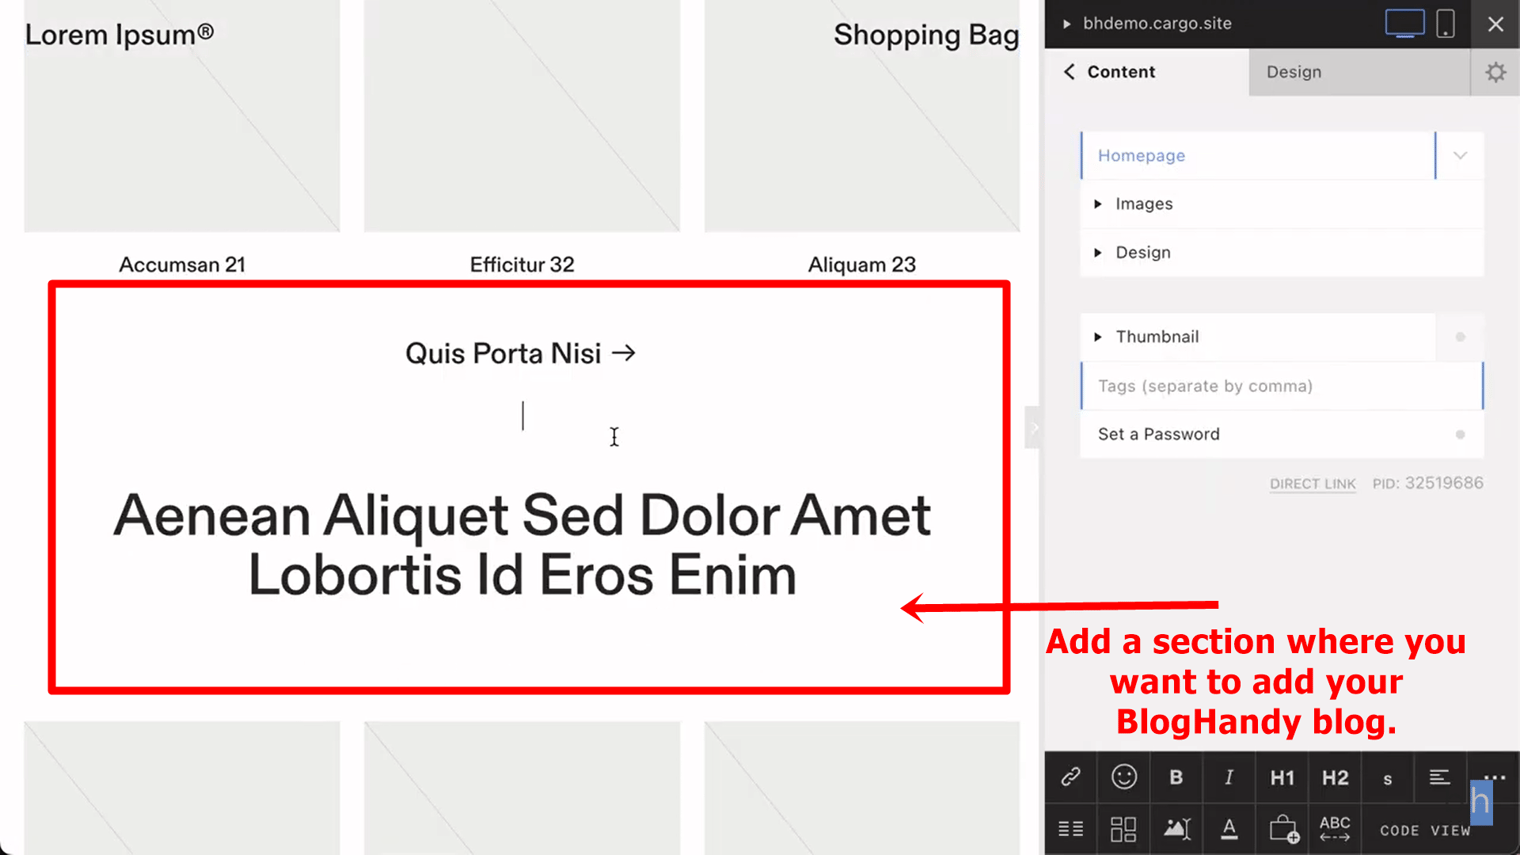
First, you can go to your Cargo editor page where you can see the preview of your website. Add a new section on your web page for your BlogHandy blog to show up on your Cargo Site.
You can just click on the section where you want to showcase your blog, and add the blog title within the section. Highlight the blog title and change it to H1 on the right-hand side of the monitor, as you can see in the screenshot below.
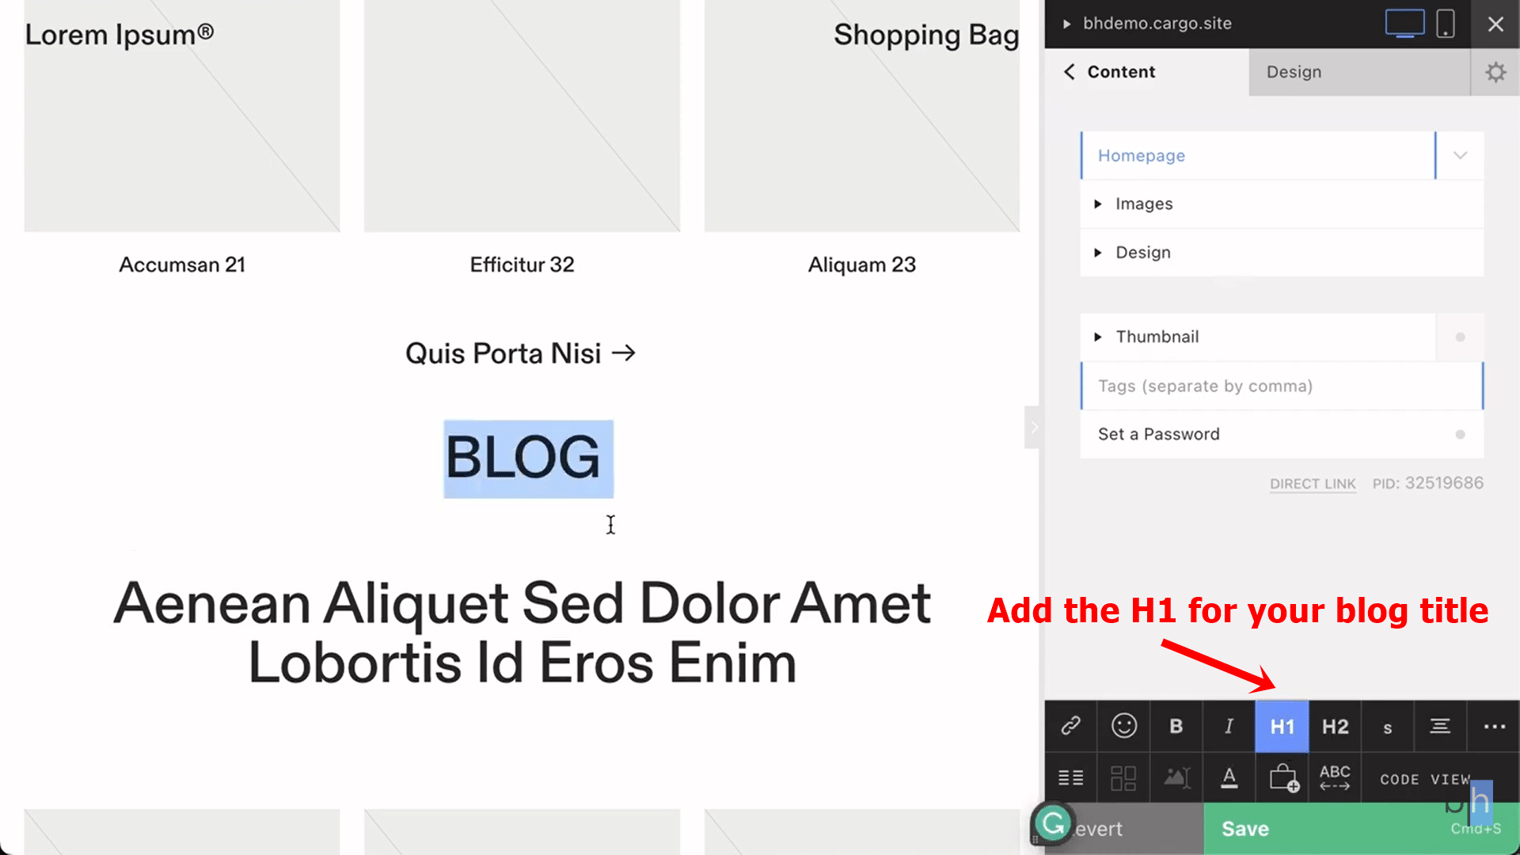
Changing the blog title to H1 on your homepage is important, not only because H1 tags on the website are important for search engines to help the audience understand the intent, but it also improves the UX for your website.
On top of that, it will be easier to identify the section where you want to place the BlogHandy codes later.
#2 Click the "Code View" option on the menu
After adding the blog title, you can move the cursor below the title and go to the right-hand side menu where you can see the "Code View" option. Click it, and your website code will pop up.

If you don't understand coding, it may seem overwhelming. However, this is how the H1 tag on your blog title will make it easier for you to streamline your Cargo Site and BlogHandy integration.
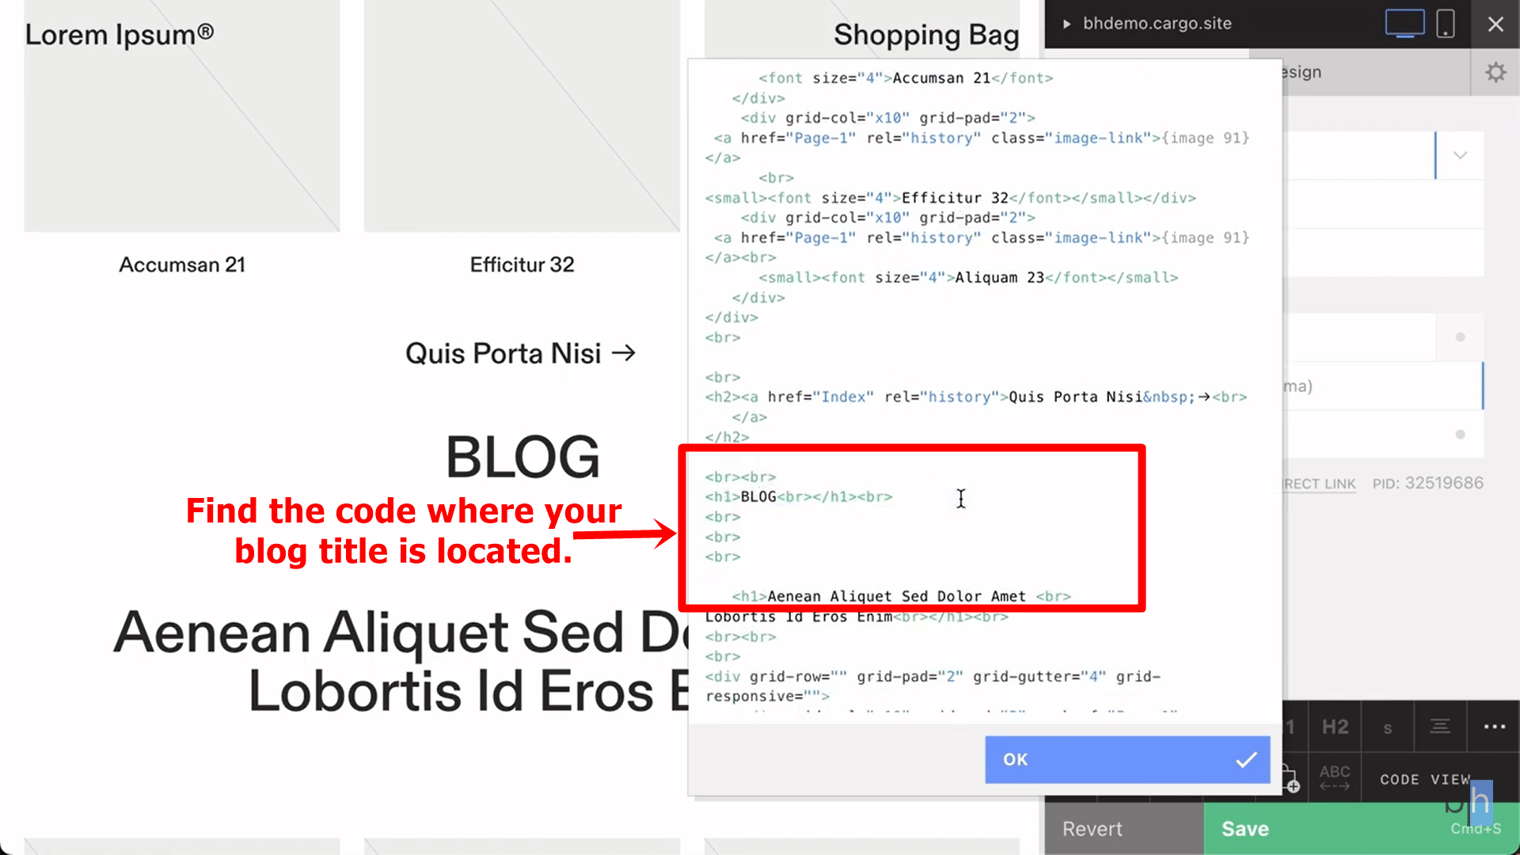
Scroll down the website coding, and find the code where it says
followed by the blog title. Alternatively, you can also push the CTRL+F and type the blog title to find the section to add your BlogHandy code.
Make a few lines under your blog title to add the code snippets from BlogHandy, and go to your BlogHandy dashboard for the next step.
#3 Copy and paste your BlogHandy code snippets on your Cargo Site
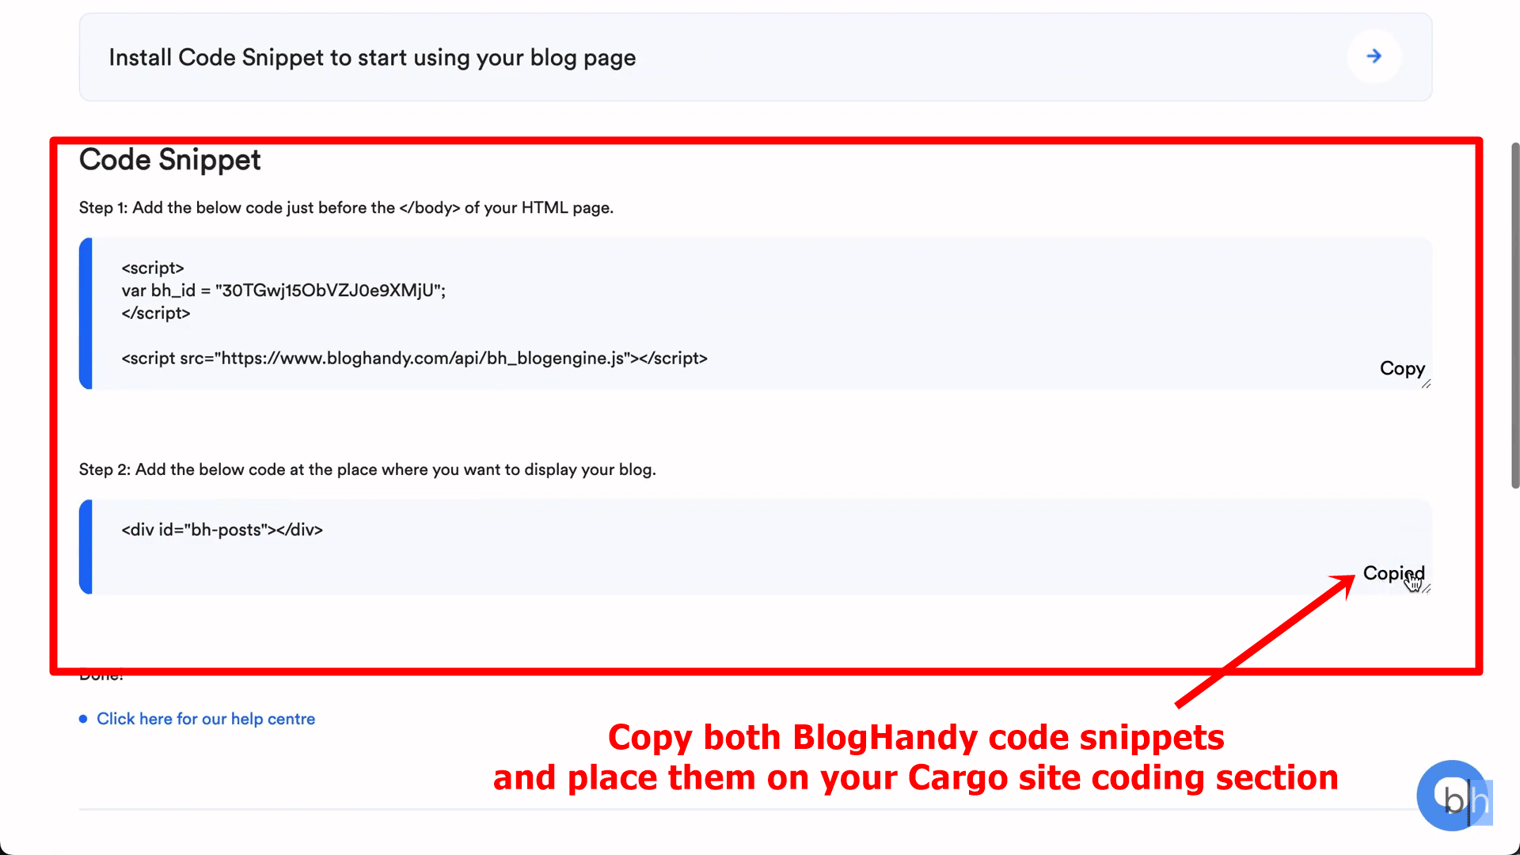
On your BlogHandy dashboard, you will find two code snippets that you need to copy to integrate your blog into your Cargo Site.
The first code should be added under the blog title on your Cargo Site coding, followed by the second code. Once all the codes are added, click "Ok" to see if your codes are placed correctly.
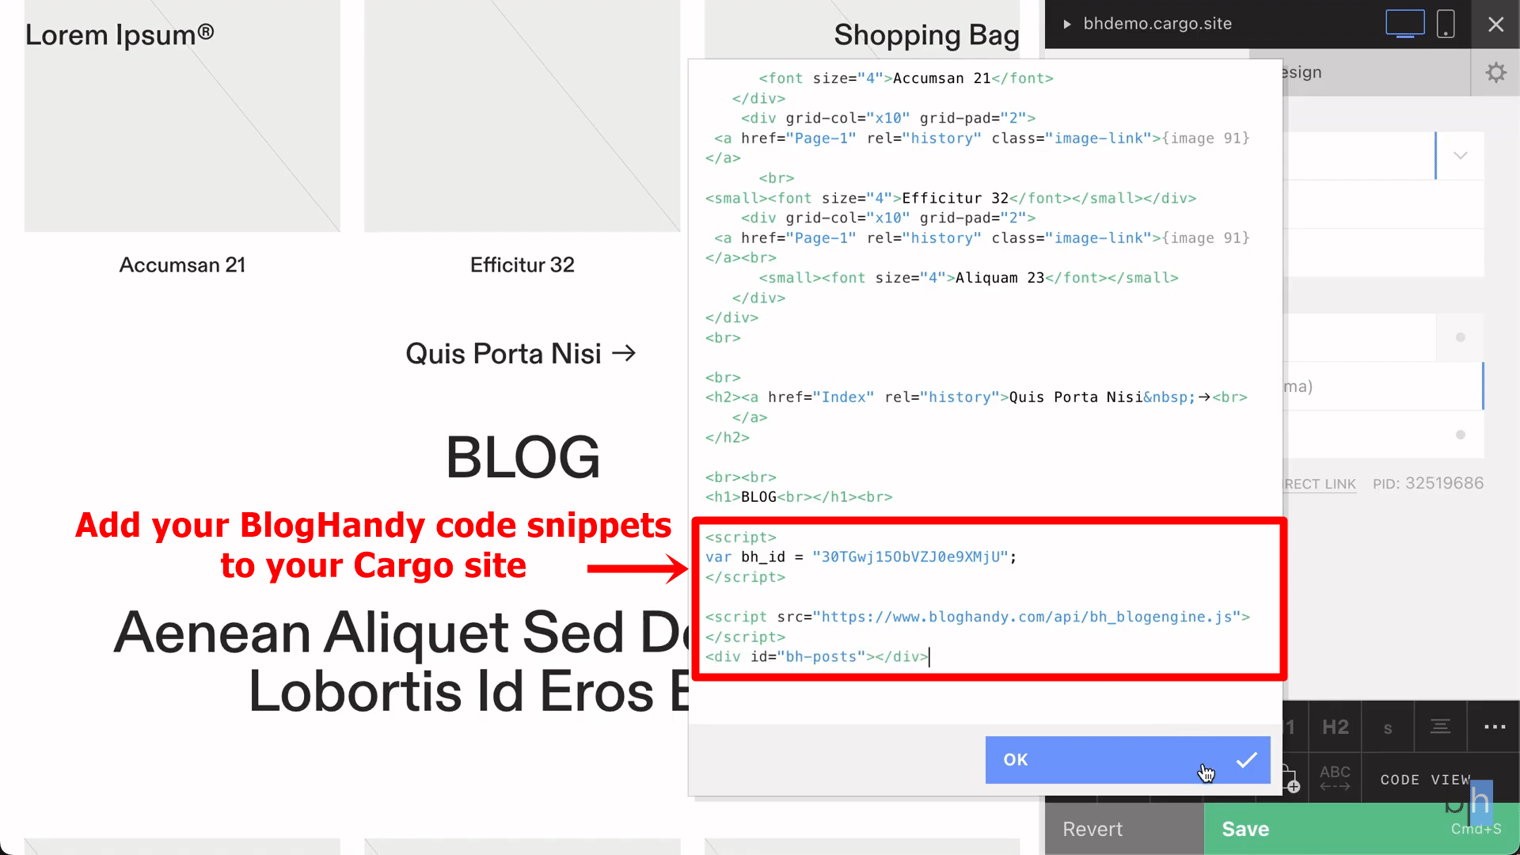
If your step is correct, then the BlogHandy page will automatically appear under your blog title. If not, you may want to double-check the coding to make sure you place it correctly.
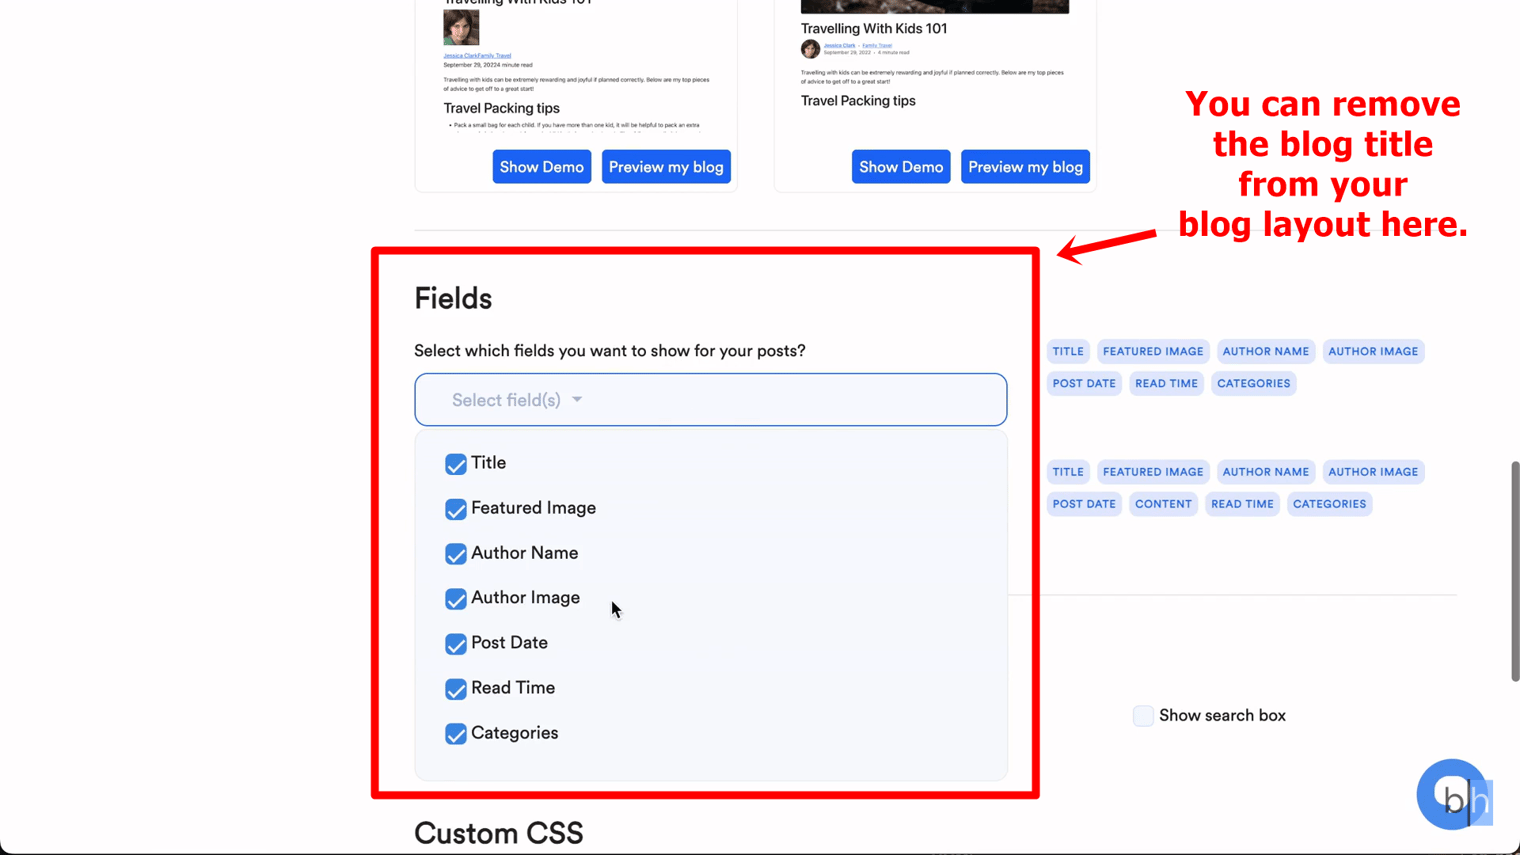
Since the interface will be based on your BlogHandy settings, you may end up with two blog titles in your blog section. You can modify this by changing the layout on BlogHandy, which we will discuss at a later stage.
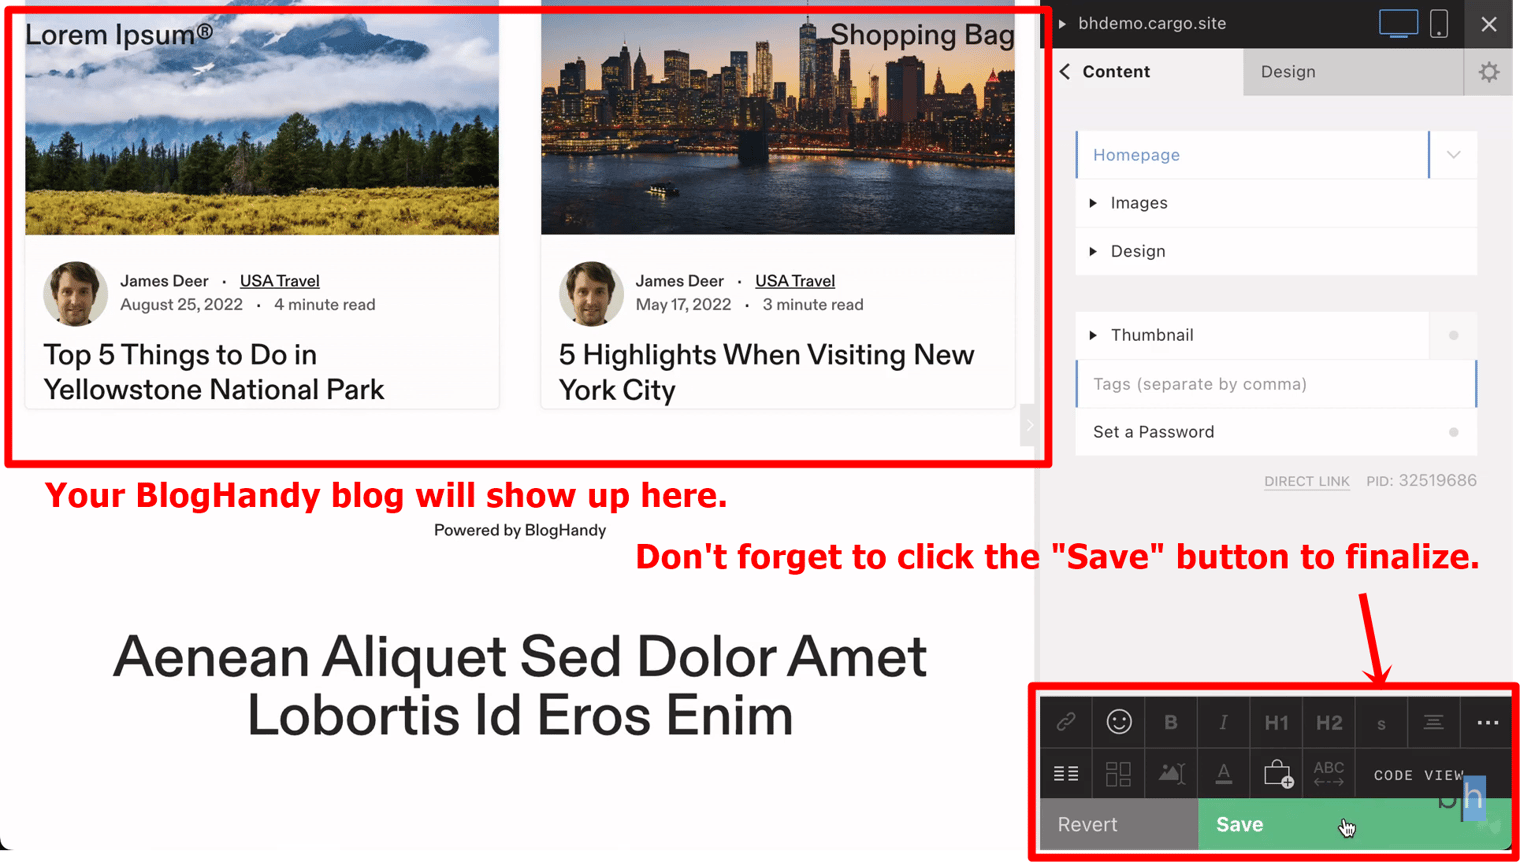
Click on "Save" on the bottom right of your monitor to update your web page design on your Cargo Site.
#4 Add your Cargo site URL to your BlogHandy settings
Once it's saved, you can check your Cargo site to ensure your blog section appears on the page. If it's good to go, copy the site URL on your Cargo site and go back to your BlogHandy dashboard.
Click "Settings" on your BlogHandy dashboard; under "General," you will see the Blog URL column in the first section. Paste the site URL there to finalize the integration of your Cargo Site and BlogHandy blog.
Make sure to add #cargo at the end of the Blog URL to make the integration fully work.

Next, don't forget to scroll down and click the "Save all changes" button.
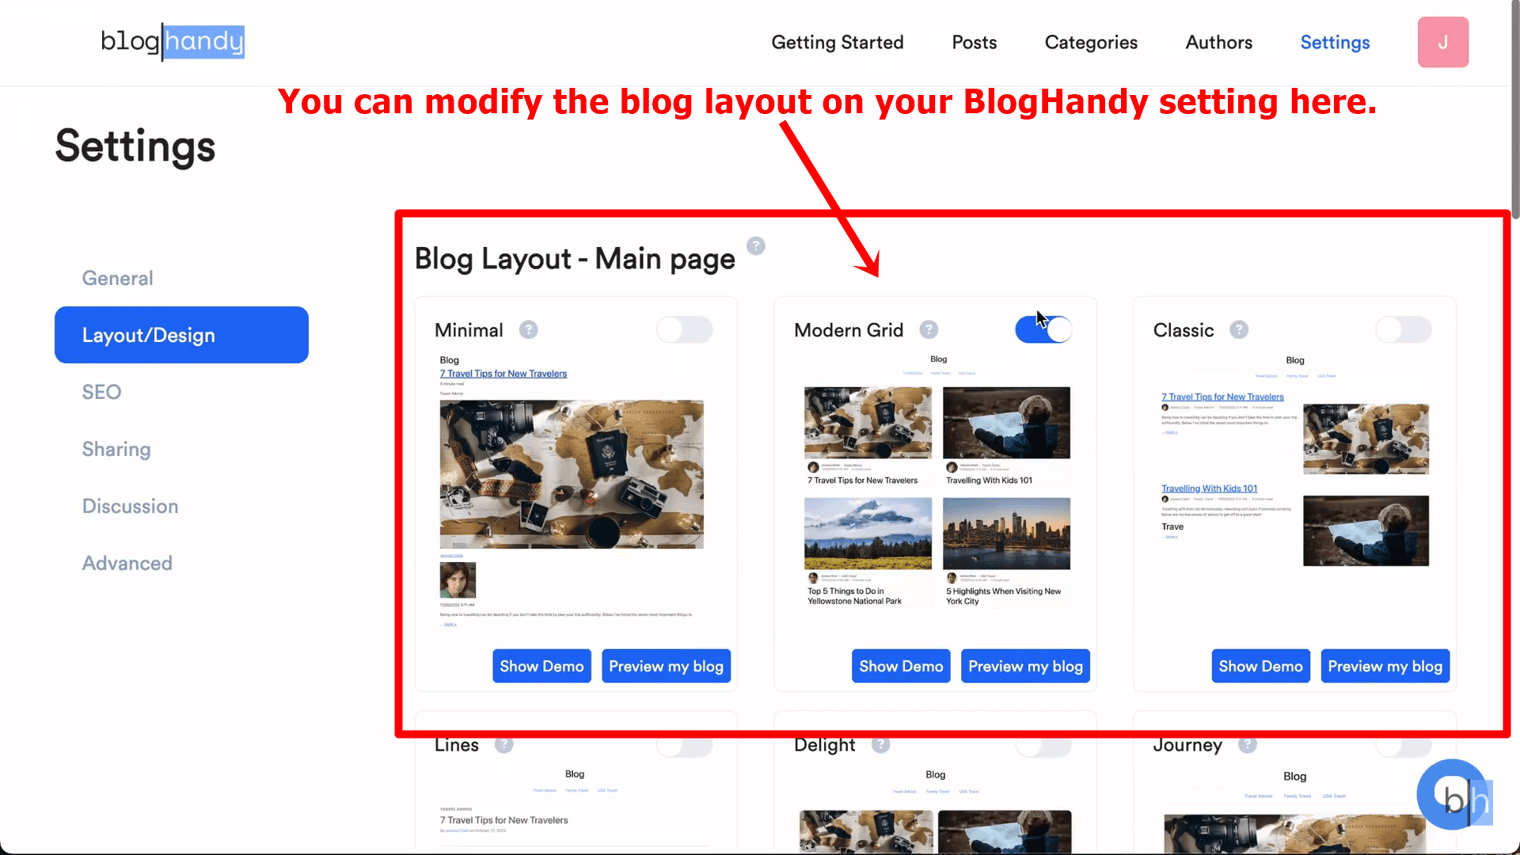
#5 Change your blog layout on BlogHandy
After integrating your Cargo Site URL, you may want to change the blog layout to fit your preference. In the same section under "Settings," you can find the "Layout/Design" sub-section to modify it.
BlogHandy comes with nine native templates that you can opt for based on your preference. You can also change the layout for the single blog page accordingly. In addition, you can also customize it in the designated section using CSS.
Under the same section, you will see the "Field" option with a drop-down menu. Click on the latter, and you can uncheck the "Title" to remove the blog title from your Cargo site blog.
Once everything is set up, click the "Save all changes" button to finalize.
Conclusion
As Cargo Site offers various top-notch web designs to enhance your online presence, adding a BlogHandy blog to your Cargo Site can complement the design with some additional features that benefit your website for search engine optimization.
BlogHandy also comes with SEO tools to assist you with content creation to ensure your blog posts are optimized for SEO. It's an all-in-one blogging platform that can be easily integrated with various web builders, including Cargo.
If you have a Cargo site that you want to optimize with a blog page, you can sign up for free here to see how the BlogHandy functionalities can help you bring your business website to the next level!