.jpg)

There are plenty of web builder platforms that enable you to create a website with no coding skills necessary. After talking about Webflow the other day, today we will talk about Bubble.io and how we can add a blog on your Bubble.io website with BlogHandy.
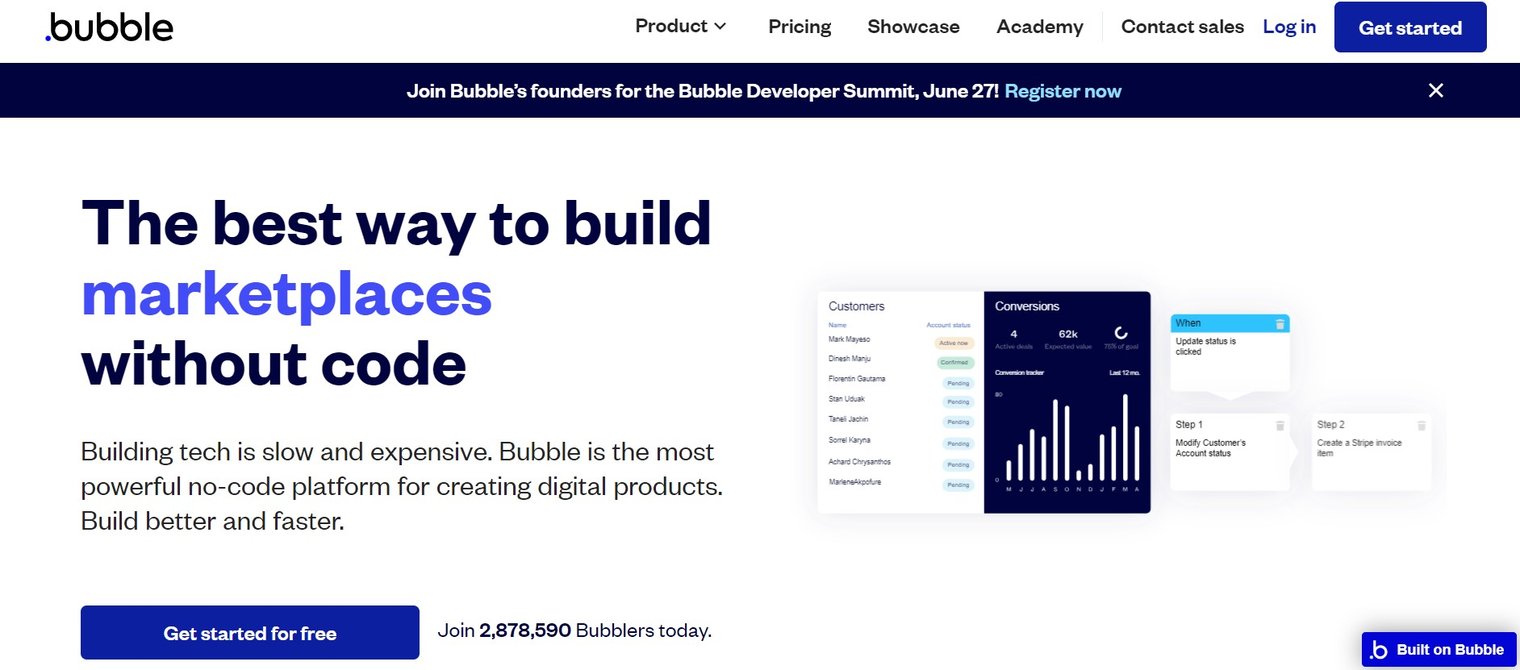
For those who don't have any programming experience, Bubble.io can be a good option for developing an interactive and dynamic website for their business. It comes with a visual interface and drag-and-drop feature that allows you to build a professional-looking web app without any coding necessary.
To complement its advanced web building feature, BlogHandy also comes with a search engine optimized blogging feature that you can integrate easily with your website on Bubble.io.
In this post, we'll share some advantages of using Bubble.io as your web builder platform and how adding a blog on your Bubble.io website with BlogHandy can boost your digital presence on the world wide web!
Bubble.io as a Web Builder Platform
Bubble.io may not be the first thing that comes to mind when you're looking for a platform to build a website. However, Bubble.io is proven to be one of the best options for creating websites and apps with the most advanced features in the market.
You can sign up for a free account on Bubble.io to create a prototype of your website before launching it. Compared to other web builders like Weebly or Wix, the pricing for Bubble.io is higher, but its rich features make it worth spending more on your web development.
Unlike its other counterparts, Bubble.io allows you to implement user authentication and manage user permissions easily, which can be crucial, especially if you want to create web apps that require user registration for a personalized experience. It also offers integration with third-party apps and APIs, so you can connect your website to popular platforms such as Stripe or any other payment methods or Google Maps for location services.
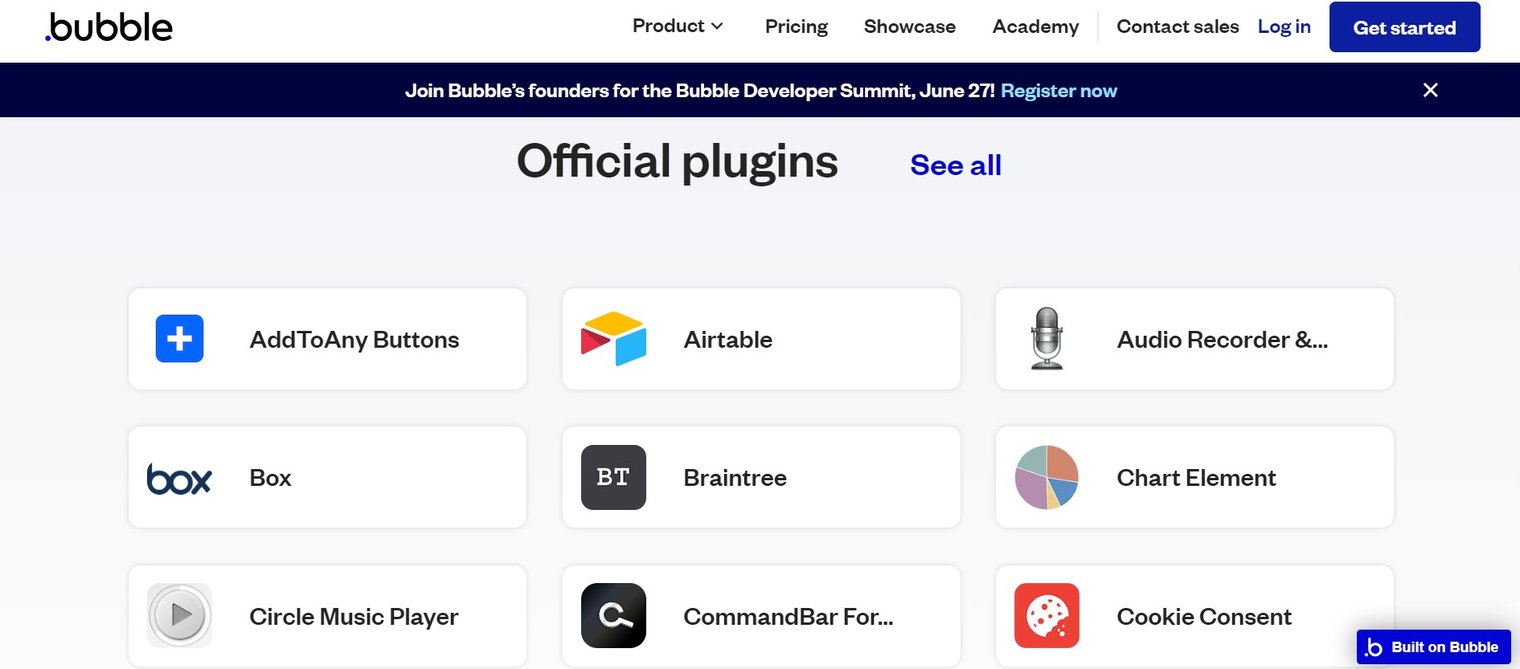
To top it all, Bubble.io also provides a rich plugin ecosystem that allows you to extend the functionality of your website. Whether you want to implement plugins created by the Bubble.io community, or create your own plugin to optimize your web apps, Bubble.io is a great platform to enrich your website functionality and improve your audience's user experience.
Despite all the advanced features that Bubble.io has to offer, it may not be the most optimal platform for blogging. And this is where BlogHandy can complement the blogging part on your Bubble.io website so you can have a streamlined website with top-notch blogging functionality.
How to Create a Blog on Bubble.io with BlogHandy
The best thing about using Bubble.io as your web builder platform is that it provides flexibility and customization options that allow you to integrate your web apps with other platforms like BlogHandy. If you want to optimize your Bubble.io app with blog marketing, you can add a BlogHandy blog to your website with these simple steps!
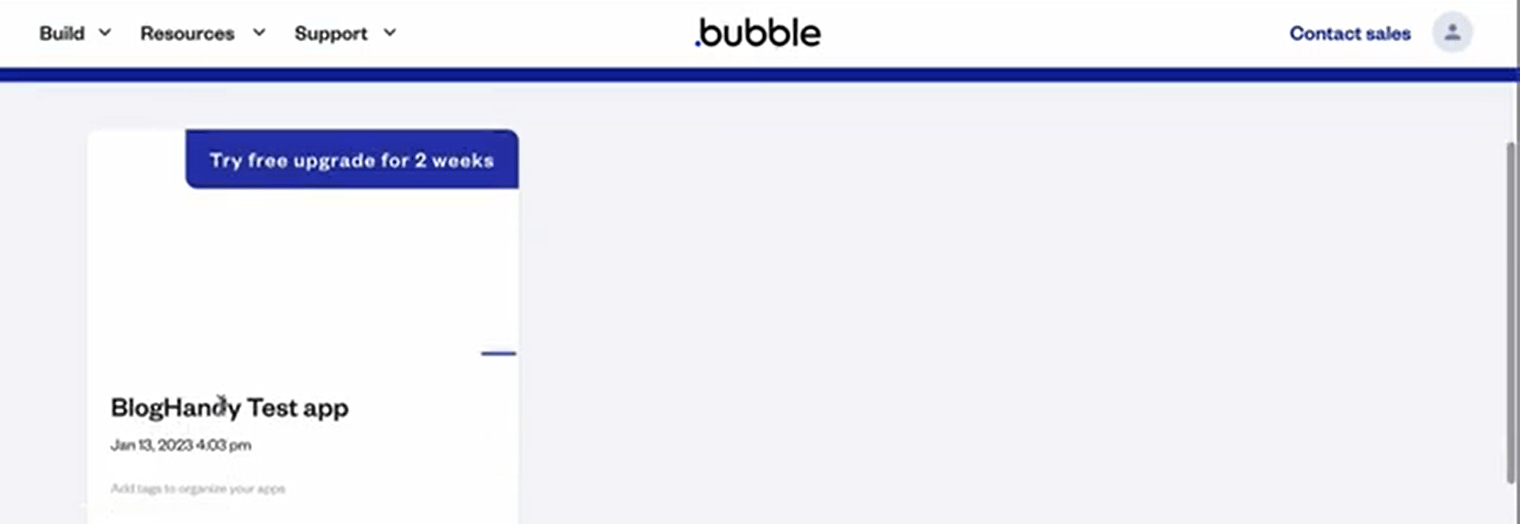
#1 Create an app on your Bubble.io account
After signing up for your new account on Bubble.io, you can create a new app on your page by following a few instructions. Rename the new page, and follow the steps that will lead you to the app editor page. When it's successfully created, you'll be able to see your new app on your Bubble.io dashboard, as shown in the screenshot above.
Click the box to get to the editor page that will look like this.
.png)
#2 Add an HTML Box on the page editor to paste the BlogHandy codes on your Bubble.io website
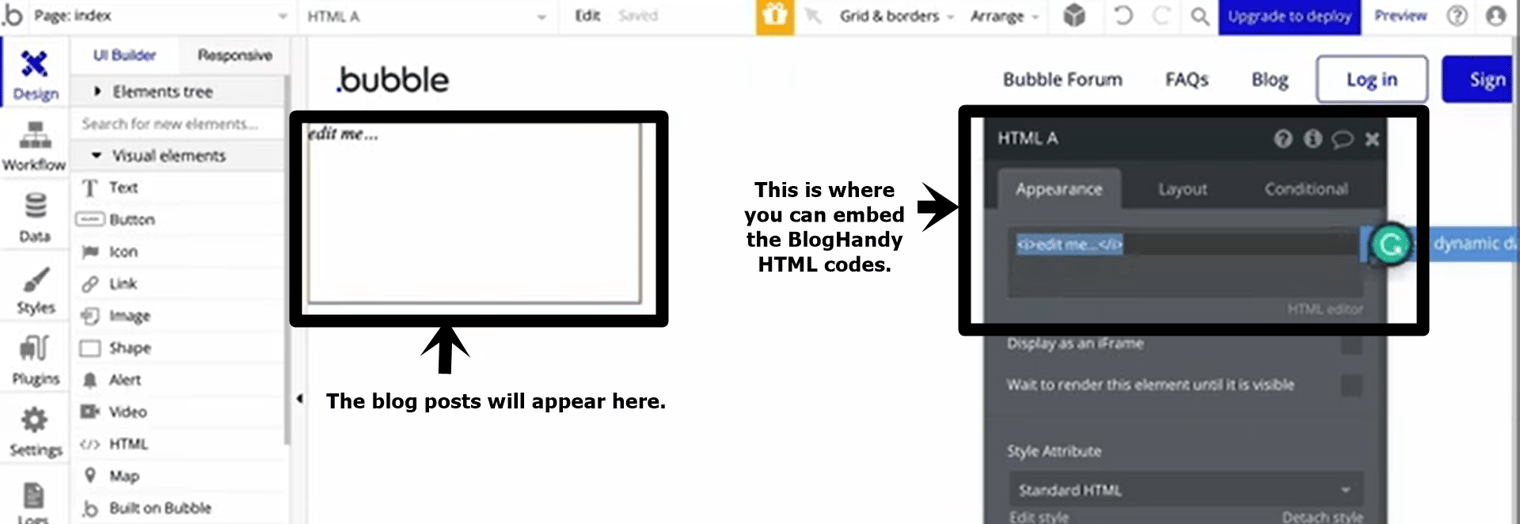
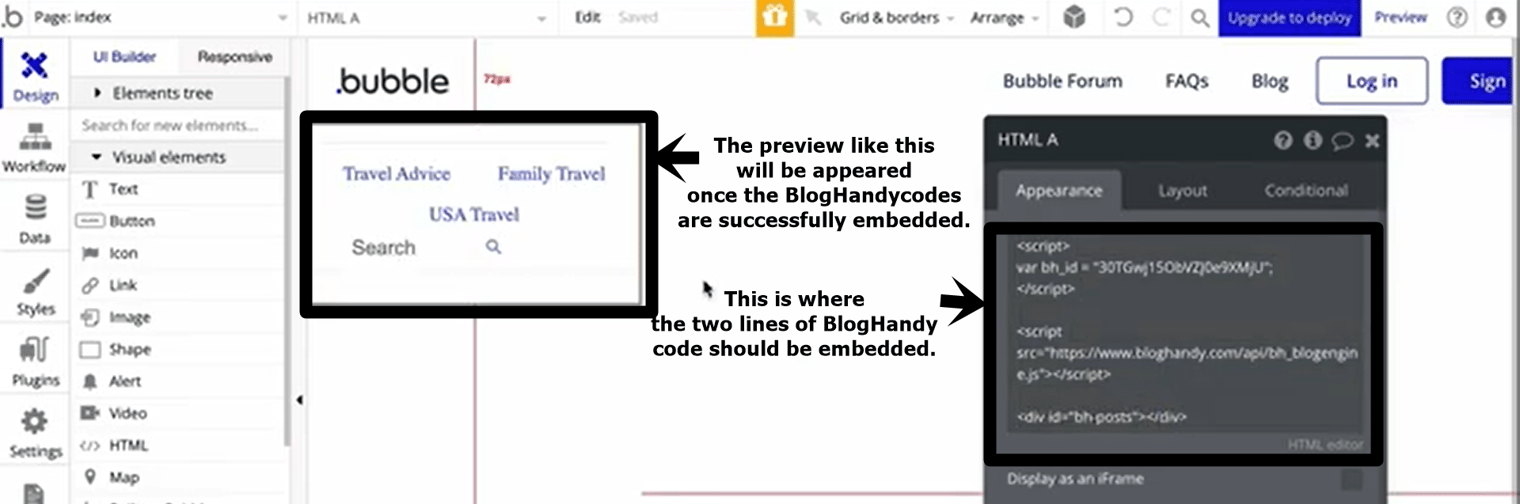
On the right hand of your monitor, you can see the menu options to edit your web app. Make sure to click the "Design" section so you can see the list of sub-sections that includes Text, Button, etc. In this section, you can see the HTML option as shown in the screenshot; click it until two boxes appear on your page editor.
The first box on the blank page editor is the box where the blog posts will appear once you successfully embed the BlogHandy page. The second box is a pop-up box where you can paste the BlogHandy codes on your Bubble.io website.
#3 Go to your BlogHandy dashboard to get the two lines of code to embed on your Bubble.io website
Sign in to your BlogHandy account, and you'll see the two lines of code on the dashboard. Copy each code on the pop-up box on your Bubble.io page editor. Once it's successfully added, you'll be able to see the preview of the BlogHandy posts in the blank space on your page editor.
If the preview appears there, it means you'll paste the right codes successfully. If not, double check to make sure that you paste the two lines of code on your BlogHandy dashboard.
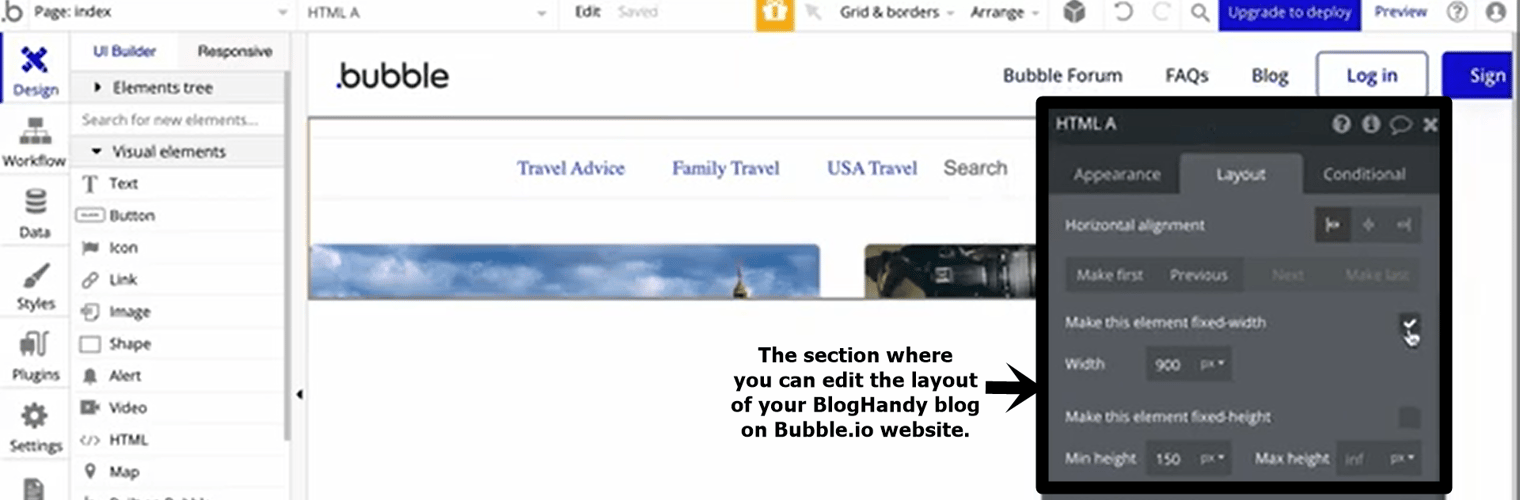
#4 Adjust the page layout on your Bubble.io editor
Next, you will need to adjust the layout to ensure that your blog page will look decent to increase the user experience for your website. Go to the HTML box, and click the "Layout" section to customize it.
In this section, you will have the option to make the HTML fixed width; check this section if you want to do so. Alternatively, you can also uncheck the box and you can customize it by setting up the minimum and maximum width for your blog page section on your website.
Scroll down to find the section where you can adjust the HTML height. We suggest editing the minimum height to 100% for this part. To finalize this section, you can scroll up to find the Horizontal alignment section to edit. You can choose the center alignment to make your website design look balanced.
#5 Click the preview of your BlogHandy blog on Bubble.io website
Close the pop-up box once you have customized the layout according to your liking, and the blog page behind you will appear based on the edit you made. To double check, you can go to the top of your page and see the button where it says "Preview" and click it.
Next, you will see how the blog looks from your audience's point of view.

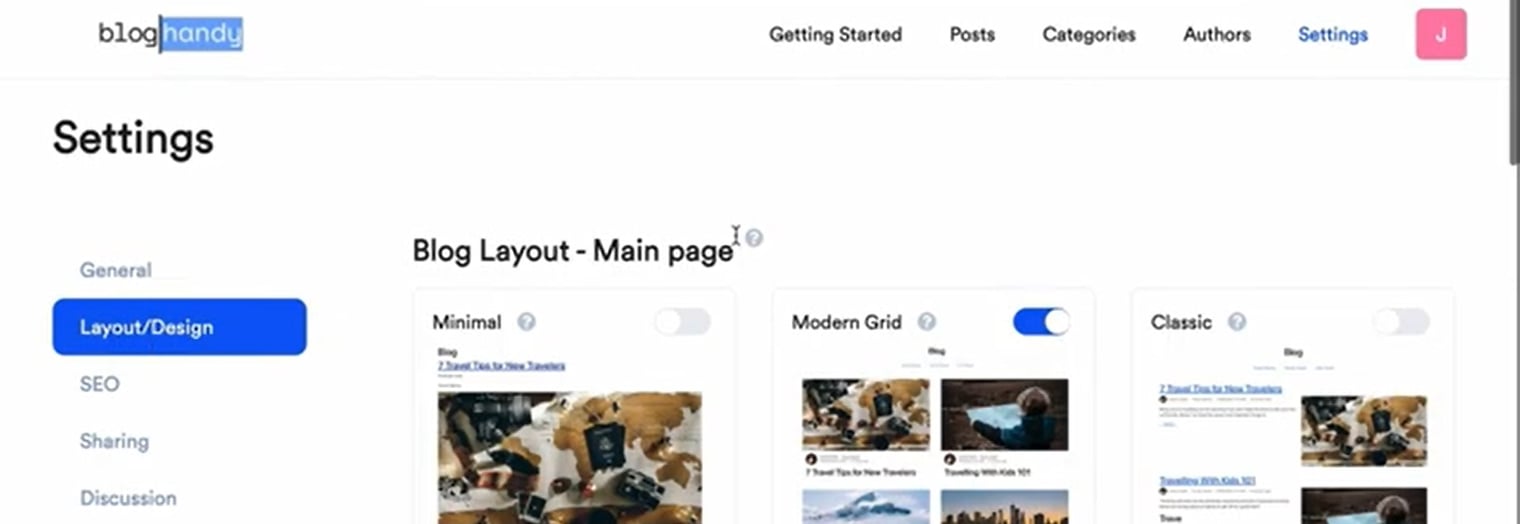
#6 Edit the blog layout from BlogHandy settings
BlogHandy will adjust to your website's original theme on Bubble.io, so the page will automatically adjust to the layout including the font and colors used on your Bubble.io website.
However, you can also change the grid view of your blog page on BlogHandy settings. In addition, you can also add custom CSS if you want to change any element on your blog page, including the headline font page.
Go to your BlogHandy dashboard, and click Settings and choose the "Layout/Design" section to edit the grid view based on your preference. If you want to add custom CSS to the page layout, you can scroll down and add the CSS in the box.
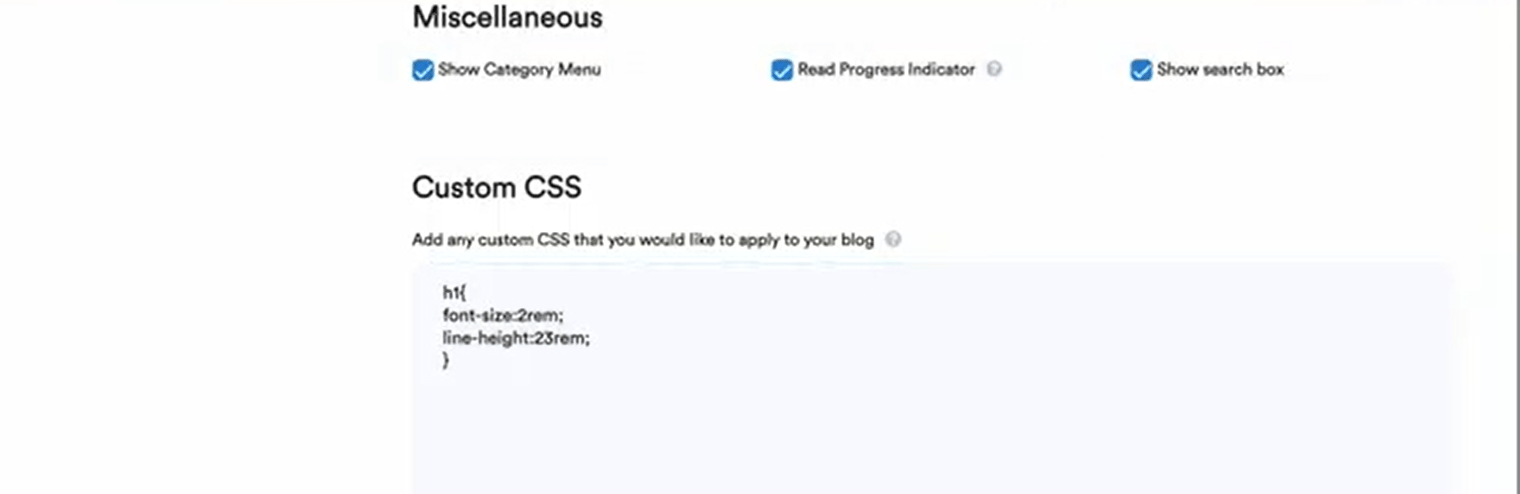
#7 Change the font size on BlogHandy settings
One of the things that you can change on the custom CSS is the font size on your blog page layout. Go to the Custom CSS blox on BlogHandy settings, and add the code accordingly.
For instance, you can use the below code to change the H1 font for your blog page and save all changes on your BlogHandy settings to finalize.
Conclusion
Bubble.io offers many great tools to create a professional-looking website with the high functionalities you need for your website. Although Bubble.io also comes with a native blogging platform, you can enhance the blogging tool by integrating your Bubble.io website with BlogHandy.
Adding a blog on your Bubble.io website with BlogHandy is quite straightforward, as you only need to add two lines of code to complement their functions as a standalone platform.
Through the integration of Bubble.io and BlogHandy, you can create a dynamic website for your business with all the advanced features to enhance your user experience. At the same time, you can also optimize your website through SEO by implementing some content marketing strategy to rank for specific keywords related to your industry. In addition, you can also add social sharing tools for various social media platforms, from Facebook to Pinterest.
If you have a Bubble.io website already and you're planning to implement a blog page on your website, you can now sign up to BlogHandy for free and see how it can complement your website functionality to reach more audiences through your content. So, are you ready to game up your blogging strategy on your Bubble.io website with BlogHandy?